Today’s article is on the Coleman slide for longboarding. This is a fundamental slide. It’s going to be key for controlling your speed, and it will build the foundations for the other heelside slides you are going to learn.
This guide is part of the downhill skill progression guide. Check out the guide if you want to learn about which skills you need to learn for downhill skateboarding.
Pre-requisites for this article
You should already know how to turn on your longboard, how to carve, and how to slow down – either by foot braking or doing a push-up/shut down slide.
You should also know how to setup carve (precarve) for a slide. This will be key to getting the board to break traction. If you can’t do it, you will have a lot of trouble when trying to slide the board.
I also recommend you check out the other guides as this one builds off the progress and experience you gain from following the other guides.
What is a Coleman slide?
A Coleman slide is a slide invented by Cliff Coleman. It’s also known as a shutdown, or heelside/frontside pendulum slide.
It’s a hands down slide where you swing to about 180* and back. Check out the video below for an example.
How to Coleman slide (heelside pendulum/shut down slide)
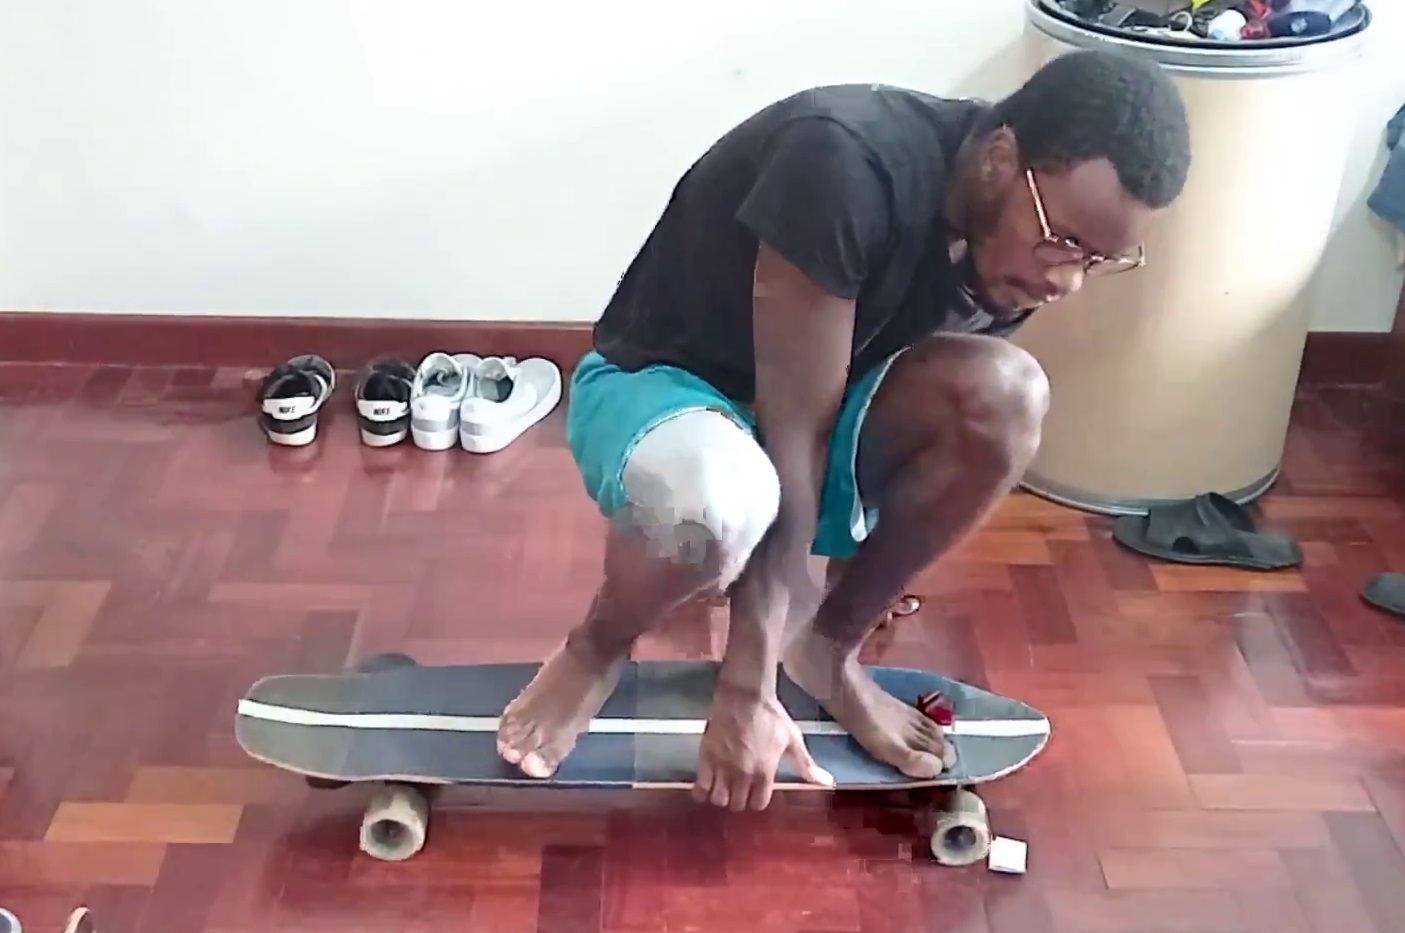
Step 0.1: Foot positioning
The first thing to look at is foot positioning. You’re going to want your front foot to be near the front truck at about a 45* angle, or an angle between 45 and 90*. Whatever is comfortable for you.
You are then going to want your feet to be about shoulder-width apart. It will look like something in the picture below.
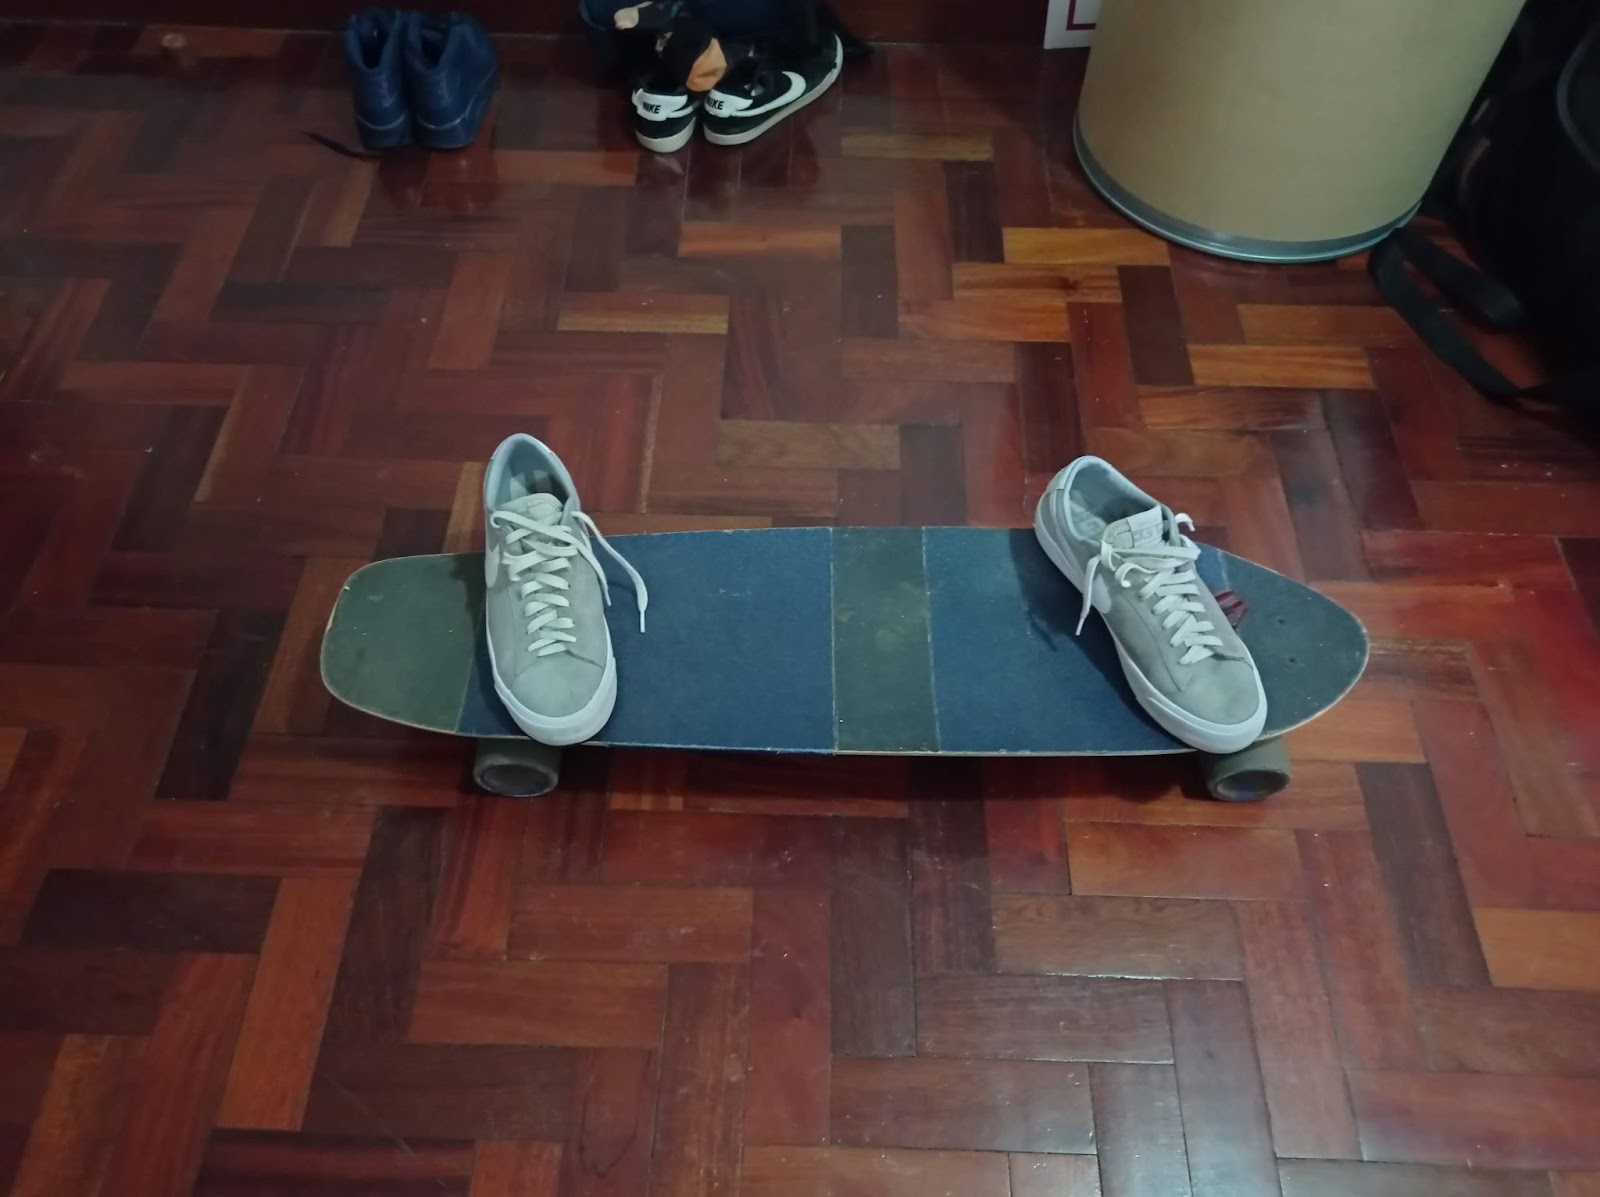
I advise you to have your back foot either in front of the back truck or on top of it. It’s also ok to have it on the middle of the board if that’s where your shoulder-width stance places it. Finally, don’t have it behind the back truck unless you can’t help it.
Check out the video below for more information and an illustration of the foot positioning (there’s also an illustration of the body positioning too).
Step 0.2: Get the right body positioning
We’re going to be starting on the ground, then trying this on the board.
You can also watch this tutorial to get a more visual demonstration and explanation of this.
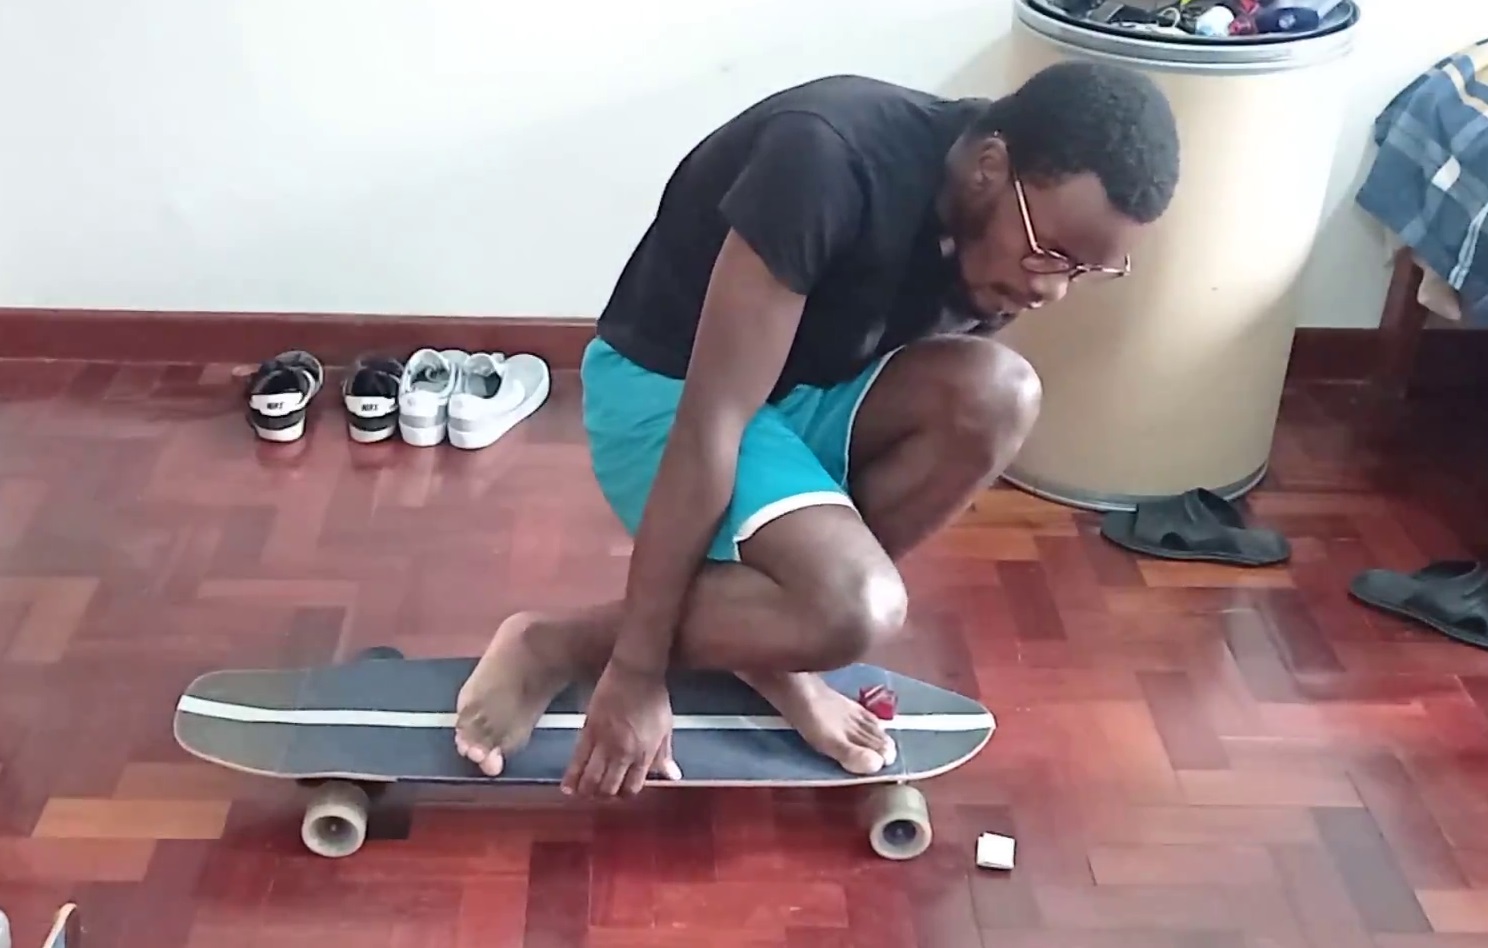
On the ground
We need to get comfortable squatting on the board (in the “box”). The position needed for heelside slides and the Coleman slide.
With the same foot position as above, you’re basically squatting on the board, with your knee touching the other knee. You want to have most of your weight on the front foot (too much weight on the back foot is gonna hurt your knee), and that’s basically it.
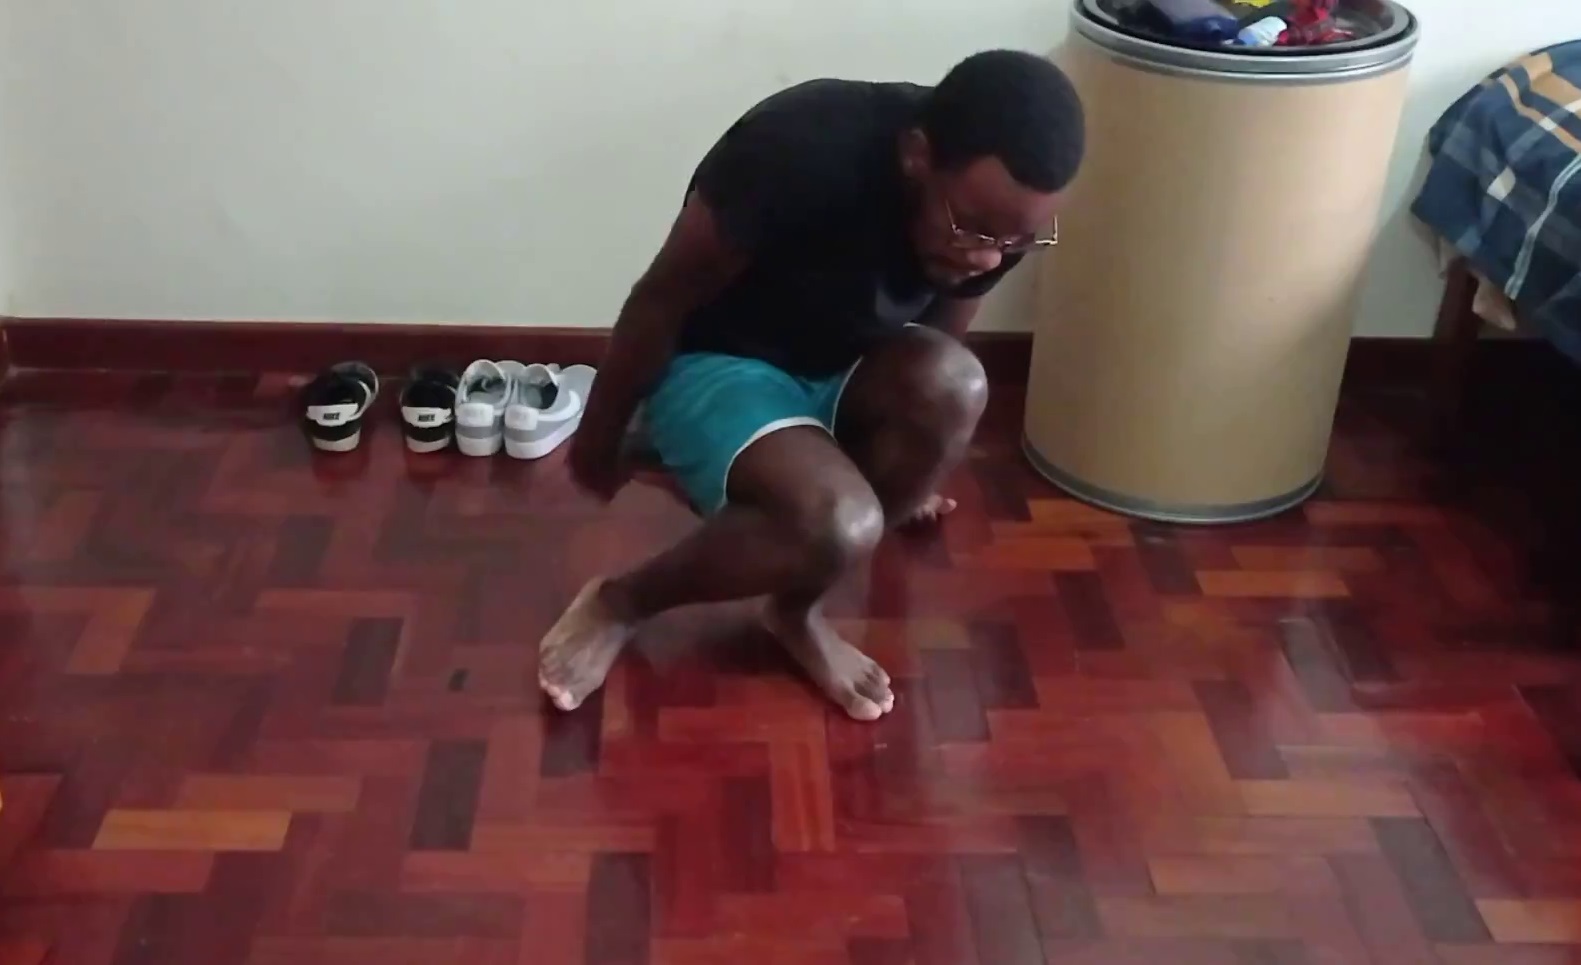
You don’t have to lean your back knee over, but it will make it easier to put your weight on your front foot. If you can’t do this, it’s ok to have your back knee facing straight up.
Your hand is gonna go to the back (with little weight on it – most weight on the board), and you want your hand slightly ahead of your front heel.
**Tip: I like to ball my hand into a fist, which makes it easier to put weight on it when I’m practicing.

Then when you get up, you push off your front foot into the standing position – great way to maintain weight on your front foot as you stand.
Key tips:
- Don’t put too much weight on your hand, maybe 10-20%.
- You want a balance of 60-70% of your weight on your front foot, and maybe 30-40% on the back foot.
- Try to keep your back foot flat.
- This will be a bit tricky and will require some practice.
Now we will move on to your board and see if it feels the same.
On the board
On the board, balancing is a bit harder, bit more awkward, and the distance to reach down is further.
It feels weird but it’s gonna be better when you’re actually moving.
Flexibility challenges
At this point, some of you may have trouble getting into the heelside positions. You likely have flexibility challenges.
Check out the video below at 6:05, for a visual illustration and explanation of the flexibility challenges you might have with heelside stuff.
A good way to test your flexibility is by trying a full body-weight squat with your feet shoulder-width apart, and your heels flat. If you can’t get your bum low and close to the ground, you likely have poor lower body mobility.
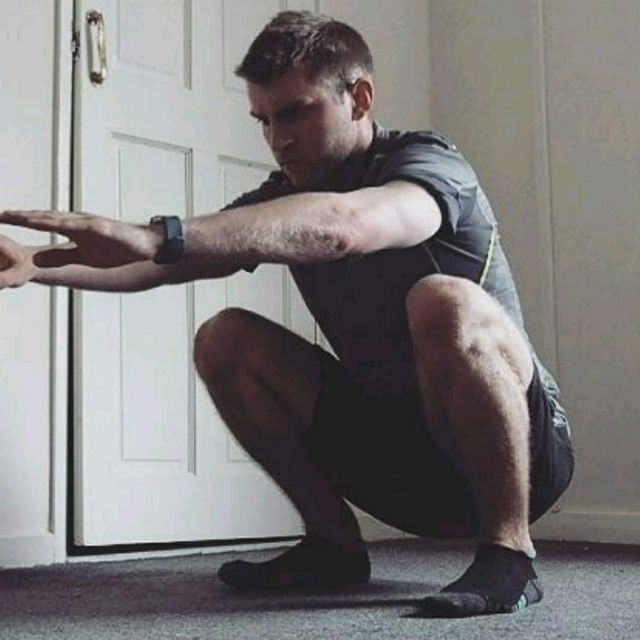
This will hinder your progress with heelside stuff as lower-body mobility is necessary for it. You can still learn it, but you will have issues. I highly recommend undertaking a mobility routine and warming up before you go slide. This will improve your flexibility and over time you will be able to do heelside stuff comfortably.
How flexible do you need to be to try heelside stuff?
If you can get into the box position semi-comfortably both off and on the board, then you’re ready.
Step 1: Get enough speed
You’re going to want a moderate amount of speed. Coleman slides kill a lot of speed, so you’re going to want to have a significant amount of it when trying them.
I recommend learning this on a hill. It is going to be hard to push in fast enough to get a moderate amount of speed.
If you can already shutdown/push-up slide (or foot brake), you should have no fear of going fast – you can always slow down if you get freaked out. So make sure you’re going quick when attempting this.
Step 2: Setup carve
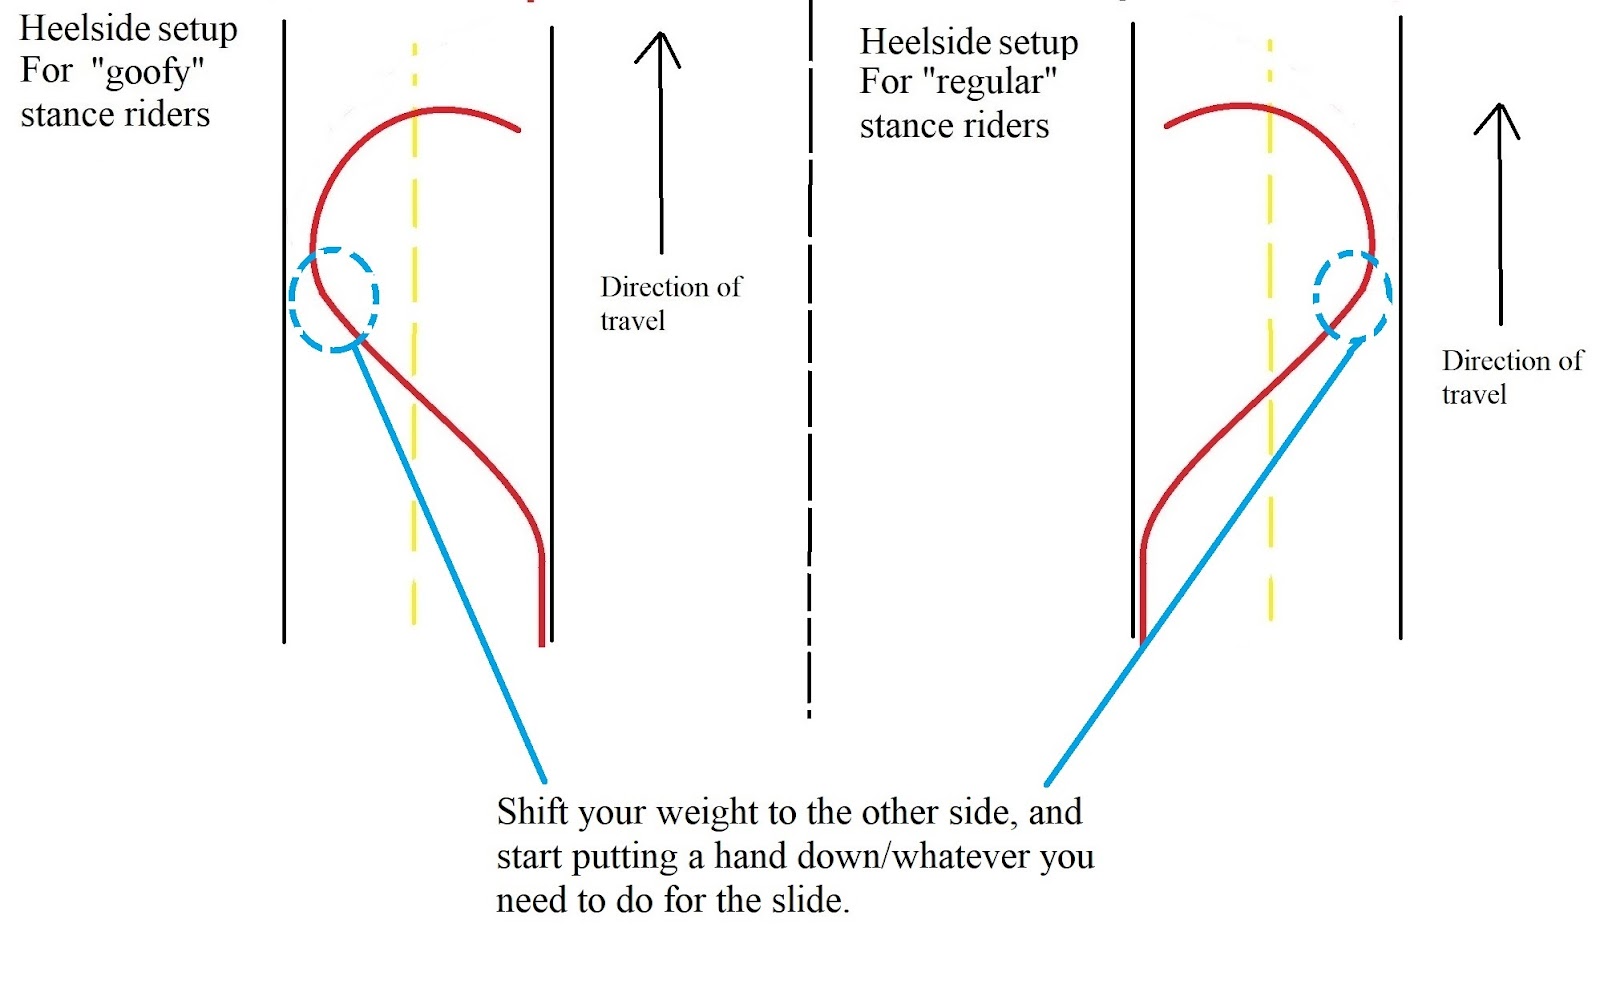
You’re going to set up carve. And when you get to about this point of the setup carve (as illustrated by the image below), you’ll start bending down and getting into the box position, and putting your hand on the ground.
To find out more about set up carving, check out this article here. If you don’t set up carve properly, you likely won’t be able to slide, or if you do, it will be choppy, sudden, and uncontrollable.
You should already be in this position by the end of this step.

Also, make sure you are in the box position and are posted and positioned well in it. It will be key to getting a nice slide. Make sure your weight is on the front foot and distributed as I highlighted above in Step 0.2.
Step 3: The slide
At about this point of the set up carve (illustrated by the image below), you’ll have your hand on the ground.

From this point you start reaching out with your hand and turning your shoulders almost 180* degrees. You want this movement to be sudden and firm. Almost like you’re swinging your shoulders out.
This should make the board want to turn/rotate in the heelside direction. Resulting in something like the image below.

This rotating of your shoulders should get the board to break traction. The movement of your shoulders affects how your board moves in a slide – your hips tend to follow your shoulders, your legs tend to follow your hips, and your board tends to follow your legs. So moving the shoulders results in a movement of the board.
In summary, we’re using the movement of your shoulders to initiate the slide.
Finally, when you rotate and swing your body, you do it until there is no more traction. Or to the point of braking traction. You don’t force the board into the slide, you “encourage” it by rotating/swing to the point of traction loss. “You swing so hard that the board loses traction. If your body is in the right position this will be controlled.”
Doing this should result in your swinging 180* and ending up in a position like in the image below.

Altogether, the swing should look like this. Check out the video below.
Troubleshooting this step
If you’re having trouble getting the board to slide out, be more aggressive with your shoulder rotation. You can even swing your arm out pretty hard and this should help you get the board to swing out. It will look something like the clip below.
Swing your arm out hard will get you to swing the board out and slide, but it won’t be the most controlled slide. I recommend practicing with this for a while, and then trying to dial it back and using your shoulders to mostly initiate the swing out.
If you’re just looking for a little bit of extra help rotating, you can swing your arm out lightly and that should do it.
Key points for the slide
- With slides, your shoulders affect the movement of your body (and the board) a lot. So if you want to break traction and swing the board around, you need to swing your shoulders.
- You also want your front leg to be stiff. You want most of your weight to be on there, with a balance of 60-40 weight on your front and back foot, or 70-30%, with about 10-20% on your hands.
- You’re not going to be pushing out with your front foot, but rather sitting on it, with your weight on your heel or middle of the foot.
- The firmer your front leg is, the easier this will be. You won’t suddenly fall forward.
- Your back foot should be firm and planted too.
- If you put too much weight on your back foot, you’re going to be high siding a lot. You need weight on your front foot to help the board brake traction and maintain the slide.
- If you’re not sat properly on board and you turn aggressively, you’ll likely fall.
- Look straight down the hill – keep your head facing straight.
- Now I say rotate 180, but don’t go full 180, just rotate the board to a shallow angle like 135* or something.
- I also said, swing your shoulders suddenly, but it’s a bit more of a drawn out swing. But it’s better if you start with it being sudden then dial it back.
You should be able to slide just doing this. The Coleman slide is more of a turn initiated by the swinging of your shoulders and arms, rather than a slide where you push the board out. You CAN push the board out with your feet, but this usually results in an inconsistent and uncontrollable slide (which is why I haven’t focused on it).
At this point, with the swing out, you should be able to get the board to slide correctly. You should just stay focused on sitting on the board properly. The rest shouldn’t be too hard.
Step 3.1: Arm position
As you’re doing the 180, you’re going to want to move your free arm in this position – illustrated by the image below.

If you swung your arm hard as I said you should in the troubleshooting step, then your arm should be in this position already.
If not as, your board rotates, swing your arm over too at about the same rate. Do it as your board swings around.
Your arm being in this position is key for the next step where you bring the board back around.
Step 3.2: Grabbing rail? (Optional)
Grabbing rail is when you use your free hand to hold the board. It is a great way to get more leverage to turn and to stay planted on the board. It also forces more weight on your front leg which is always a good thing. And yeah the steps for sliding with grabbing rail are pretty much the same … there is a wrong way to do it though.
Watch from minute 5:05 of the video below for a visual illustration of this. A text explanation will be beneath the video.
The correct way to grab rail is by grabbing over your back foot – as shown by the image below.
Grabbing between your legs is bad. It puts too much weight on the back foot, limits control, and feels awkward. Check out the image below to see the wrong way to do it. Grabbing rail this way is known as stinkbug.
Grabbing rail can be bad though
I believe it’s better to learn heelsides without grabbing rail – grabbing rail is usually for compensation (lack of leverage, trouble staying onboard) – which likely means you have bad form and bad weight placement.
And with bad form, grabbing rail forces your weight on the back knee which can be damaging long term. Too much weight on your back knee in that bent position can be very stressful for your ACL, MCL, other ligaments.
So don’t grab rail if you have poor lower body flexibility. Instead, work on your stretching and lower body mobility.
But if you can grab rail with good form (weight on front leg, knee not hurting) then by all means go ahead.
How to grab rail?
The steps are similar for Colemaning with grabbing rail. You just grab the board a bit earlier in the setup carve. As you crouch down, you also grab rail. You can also crouch and then grab rail. The first method is better I think … or more common.
Ofcourse, there is no swinging of your arms, or any real arm position. It’s mostly about shoulder movement.
Step 4: The Swing back
Now to swing back in, you just have to throw your shoulders/arm out the other way.
With the swing back and the momentum from the swing, this should allow you to get back on board.
It looks something like this – check out the clip below
Now, swinging back alone will get you on board, but not the smoothest or controllable way – we’ll work on getting it really smooth in the next step.
Also, if you’re having trouble here with rotating the board, swing your shoulders (not your arms) back a bit harder. This should help the board come back.
Some tips
When you swing back, your board, and your feet need to be planted otherwise you will slip off. This will especially be true with grabbing rail. If you’re not planted it would be easy to slip off.
And make sure you have enough speed too. Most people come to a stop when they try swing back the slide because they’re going too slow. The Coleman kills ALOT of speed, so you generally need quite a bit. More speed and you’ll get better results.
Step 4.1: Refining the swing back
Just rotating your shoulders, and arms will get the board to come back around, but it won’t regain traction in the smoothest or controllable way.
For it to regain traction smoothly, you need to rotate hard with your shoulders, and then lean into the top of your front foot simultaneously. In fact, rotating your shoulders hard should help with this leaning onto your front foot.
You can imagine it as though you’re trying to bring your shoulder through the top of your knee. As a regular rider I was trying to “bring” my left shoulder, through my left knee.
This should allow for a smoother hookup back into traction.
Leaning on to your front foot forces your weight on it. It also brings your hand closer to the board as you swing back. These two things allow for a smoother transition into going straight again.
Step 4.2: Keeping your legs planted (optional) …
As you swing back, the back leg has a tendency to go upright as you’re putting weight on it. With more weight on it, you might not hookup very smoothly.
To prevent this, keep it tucked/bent in and this should keep weight on your front foot and allow for a smoother hook up, and also make it easier to stand up on your board.
Step 4.3: Refining the swings (optional)
With the aggressive swing out and swing in, you won’t have the most control. Yes, you’ll slide, but you won’t be in full control. Now we need to work on getting the control and being comfortable with the slide.
Go practice with the swinging of your arms/shoulders, doing it aggressively, less aggressively, and find the sweet spot where you have maximum control.
Especially experiment with swinging your shoulders in, and then only swinging your arms out when you want to hookup from the slide – I think this will be the sweet spot for a lot of people. The swing in from your shoulders should be enough to get the board to break traction, and the swing of your arms should be able to get you to rotate back and get back on board.
Also, play around with pushing with your front foot on the swing back to work towards getting a smoother hookup and controlling the slide.
Step 5: Celebrations
Once you can get the swing back consistently you’ve accomplished Coleman slides. Yes, there might be some inconsistencies and improvements to be made, but that’s the gist of it. You could probably use it to make it down hills.
You’re now going to be ready for some hills and should now focus on taking corners well, or learning stand up slides, or moving on to the toeside pendulum slides (I recommend this actually).
Issues with Coleman slide
The Coleman slide isn’t too difficult to be honest, where you will have problems is:
- Flexibility,
- Not having enough speed,
- Too grippy wheels (get proper sliding wheels),
- Also, watch out for:
- Body, weight, and foot positioning – you should be on top of the board not too far off it/don’t lean back waay too much.
Some tips
- Be aggressive and confident,
- Be aggressive with your arm swings,
- Look where you want to go, your shoulders follow your head,
- A big setup carve will make breaking traction feel easier and smoother,
- You should also be going relatively fast. Without much speed, you won’t be able to pendy properly. You might be able to swing the board 180*, but you won’t be able to bring it back because you’ll be going too slow to keep a continuous break in traction.
- Try it in the rain!
- Sometimes, you might be doing everything right. But if your board sucks, you’re just going to always be held back. Might be wise to get a board built for sliding.
- The more planted you are on your front leg, the better.
- Don’t go all the way 180*. Just swing but not all the way, just keep that angle somewhere between 110-150*. I’d say 135* is optimal. 135* is like a 45* angle from the other side … Not going fully 180* will result in a smoother hookup when you swing the board back. Going fully 180 will need a more aggressive swing back which will give you a harsher hookup.
Pendies at an “advanced” level
When skating really fast and doing pendys, most advanced riders don’t swing their arms as much (or at all).
They control the pendy through their hips, where they place their weight on board, and how much pressure they have on either foot. This results in more control, with a more subtle kickout and hookup – it also means you can do the slide in a more confined space (eg. in a single lane).
Check out Josh Evans in the clip below doing a long drawn-out pendy. Watch how he controls it with his hips and feet, and how he keeps his head and shoulders pointed where he wants to go. This is how most advanced riders will be doing pendys.
Ofcourse, you will see a variety of styles. Some people will have a pendy similar to what I’ve outlined, and others more of what I’ve described above. But yeah. I will do a guide for these eventually!
Was this guide helpful?
This guide is part of the downhill skill progression guide. Check out the guide if you want to learn about which skills you need to learn for downhill skateboarding.
Let me know if this guide was useful! I had previously written about the Coleman slide in my how-to guide, but I felt it was more useful to have its own stand-alone article. Thanks for reading!
Big thanks to all my patrons for the support – David, Squirrels Adventures, Mike, Jed, Mowgii, Jan, Josh, Jay, Bryan, Owen, Daniel, Alex, Kasajja, Leah, Helge, DeLacoste, Connor, Josh, Mike, Anthony, Ismail, and Justin. I couldn’t write articles like this without you guys’ support
0 comments on “How to Coleman slide (shutdown/heelside pendulum slide)”
John Gilbert
October 3, 2021 at 3:57 amIs 12-15mph fast enough to learn pendy slides?
AbugaA
October 4, 2021 at 6:36 pmI’d reocmmend 15-25mph?