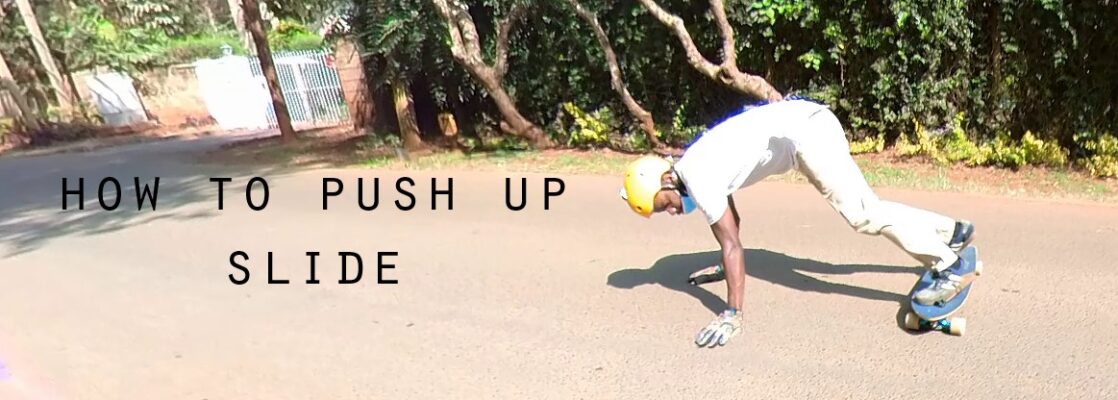
Today’s article is on how to push up slide for longboarding and downhill skateboarding. I’ll be guiding you on what to do each step of the way, with troubleshooting and useful tips to help you overcome any challenges. Check it out below.
This guide is part of the downhill skill progression guide. Check out the guide if you want to learn about which skills you need to learn for downhill skateboarding.
How to push up slide for longboarding
What is a push-up slide?
Also known as a glove down two-handed slide, two hands Tony, glove down 180, etc. the push up slide is … a slide in the push-up position hehe.
Do you have to learn it?
Yes and no. A push slide is useful for coming to a stop at almost any speed (not to say it’s the most controllable or effective slide) but you can use it at pretty much most speeds. It’s also useful when you’re learning other stuff.
When you’re learning the other slides, having the push-up slide in your back pocket will be useful. It’s useful to revert to it when you get nervous and don’t want to try something else (a new slide or technique) at a relatively high speed.
In summary, its main use is an easy way to slow you down safely at speed which is very useful when you’re learning new slide techniques.
However, if you can footbrake, you already have a braking method and you don’t need necessarily need another. The beef with foot braking, is that it isn’t easy to do when you’re going fast (+20mph), and it doesn’t slow you down very quickly either. So footbraking isn’t the best if you chicken out and need to slow down suddenly. But it is a reliable braking method and works if you have space and time.
I’d suggest you learn how to push-up slide, it will be a useful technique to have in your arsenal. Do you 100% need it? Not totally if you’re careful. You can use footbraking instead and skip to spending time on the other slides. But it is well worth learning it.
Finally, a push-up slide is gonna be the EASIEST slide to learn. So uhh yeah there’s that too. Also, it teaches you about breaking traction … all there is, is positives from learning it, so yeah learn it.
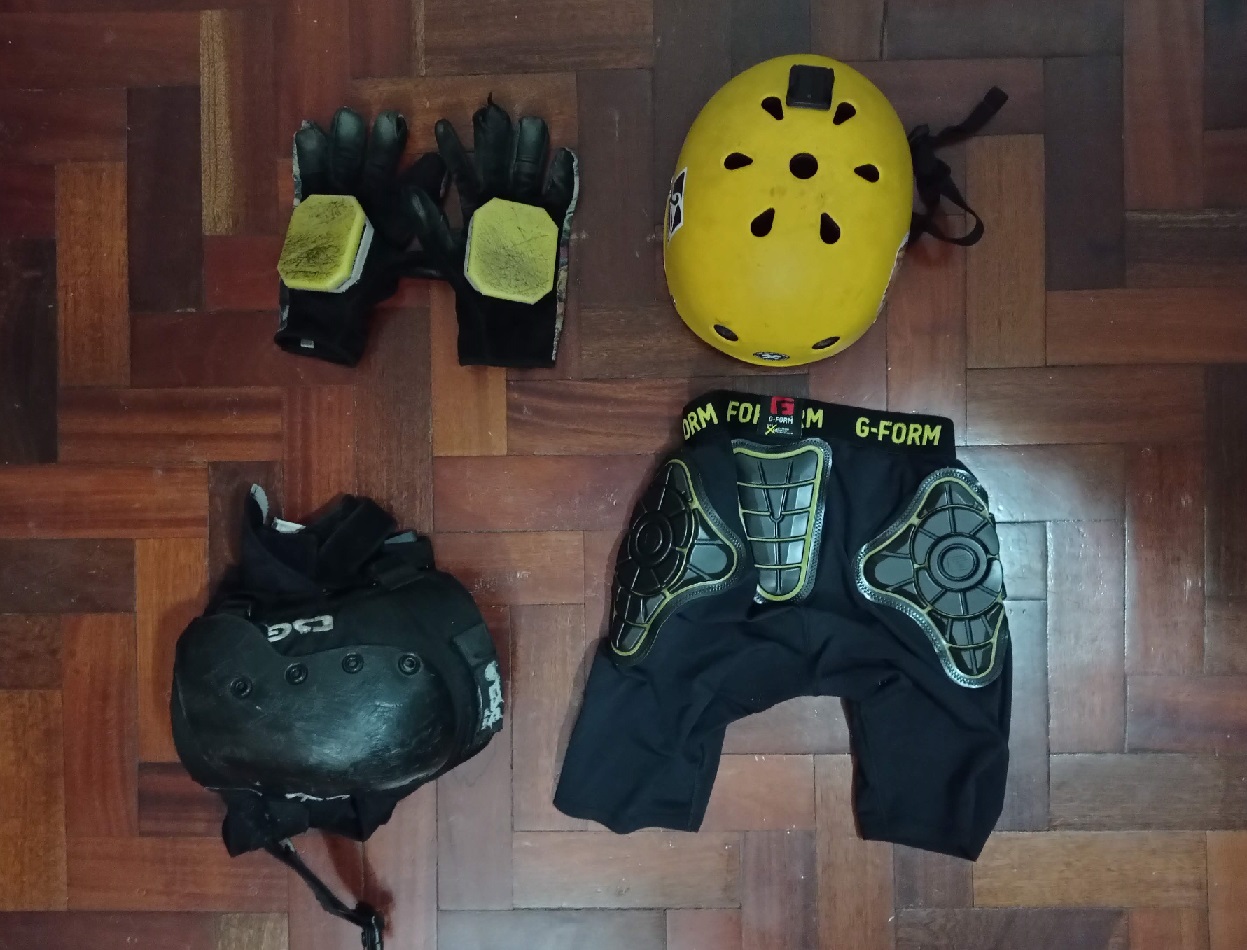
What type of gear do you need to do it?
You need a certified helmet, gloves, and a board. Things like knee, hip, and elbow pads will be useful too. You’ll be busting your *ss a lot, so hip and knee pads are clutch to keep you from getting too bruised up and being able to bounce back up and try again.
How to push up slide
Foot positioning for the push-up slide
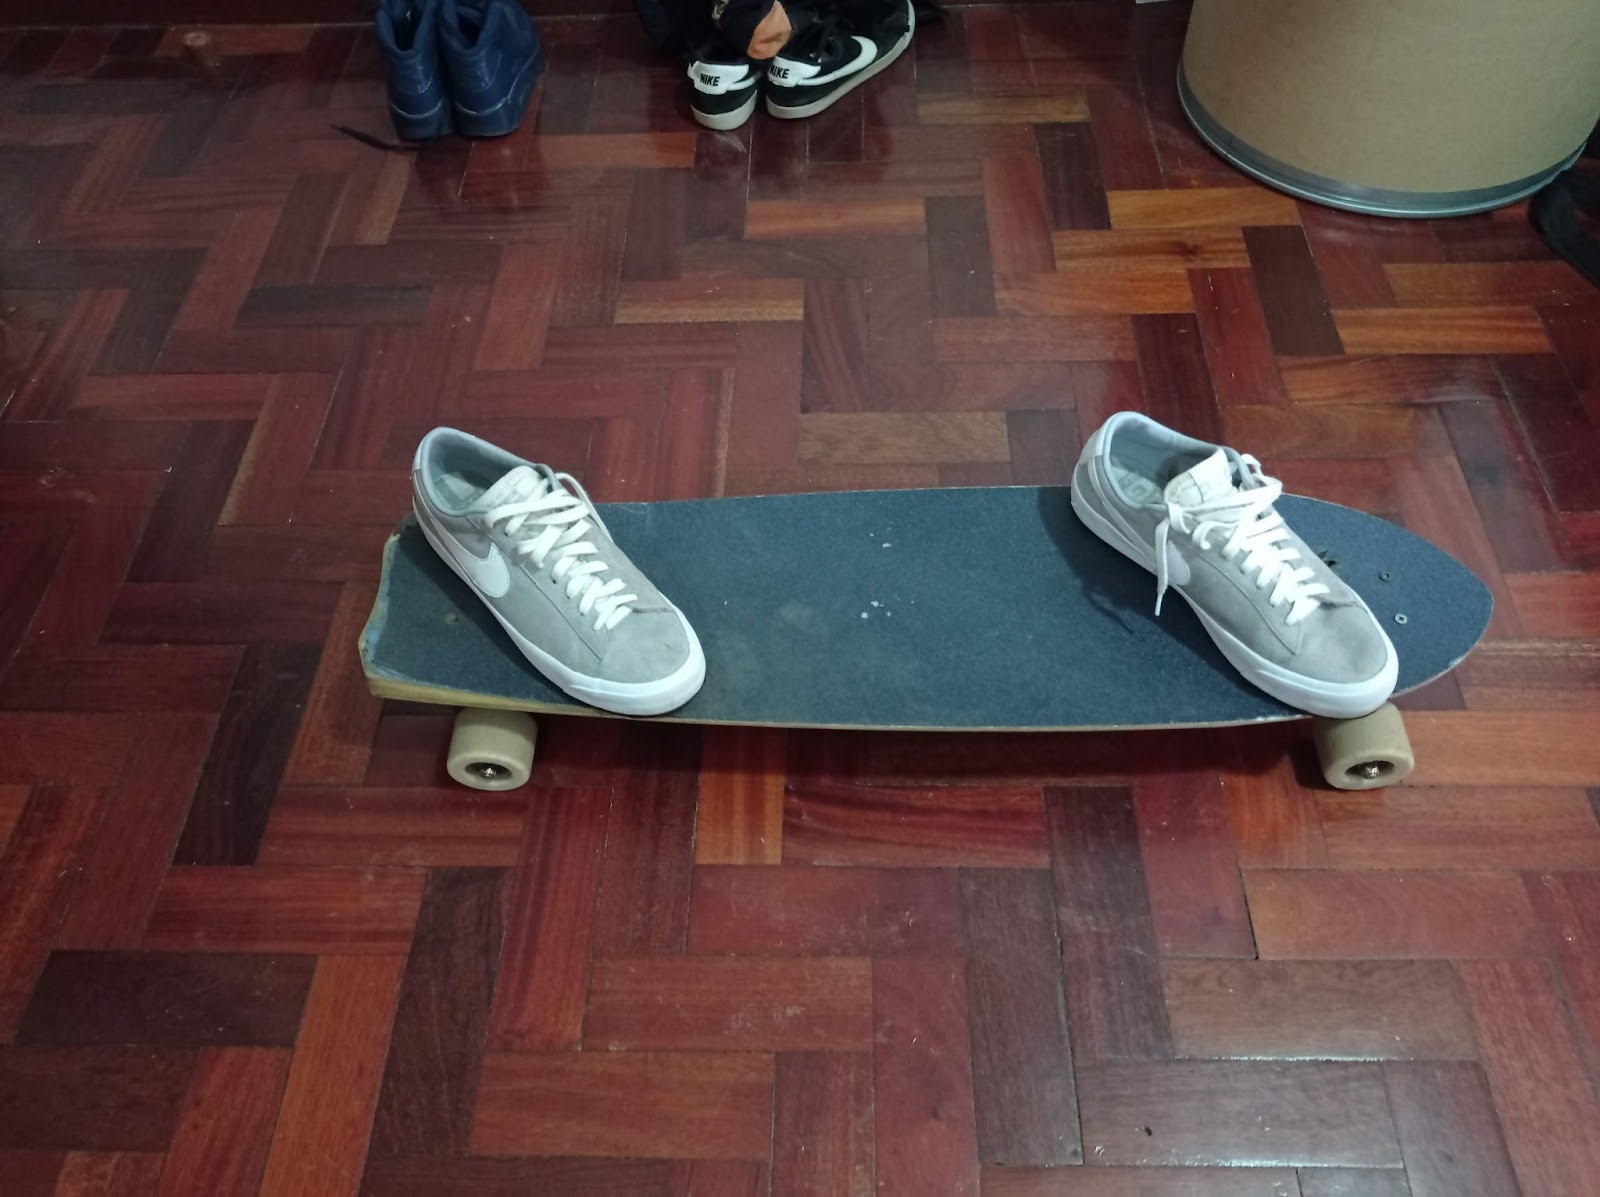
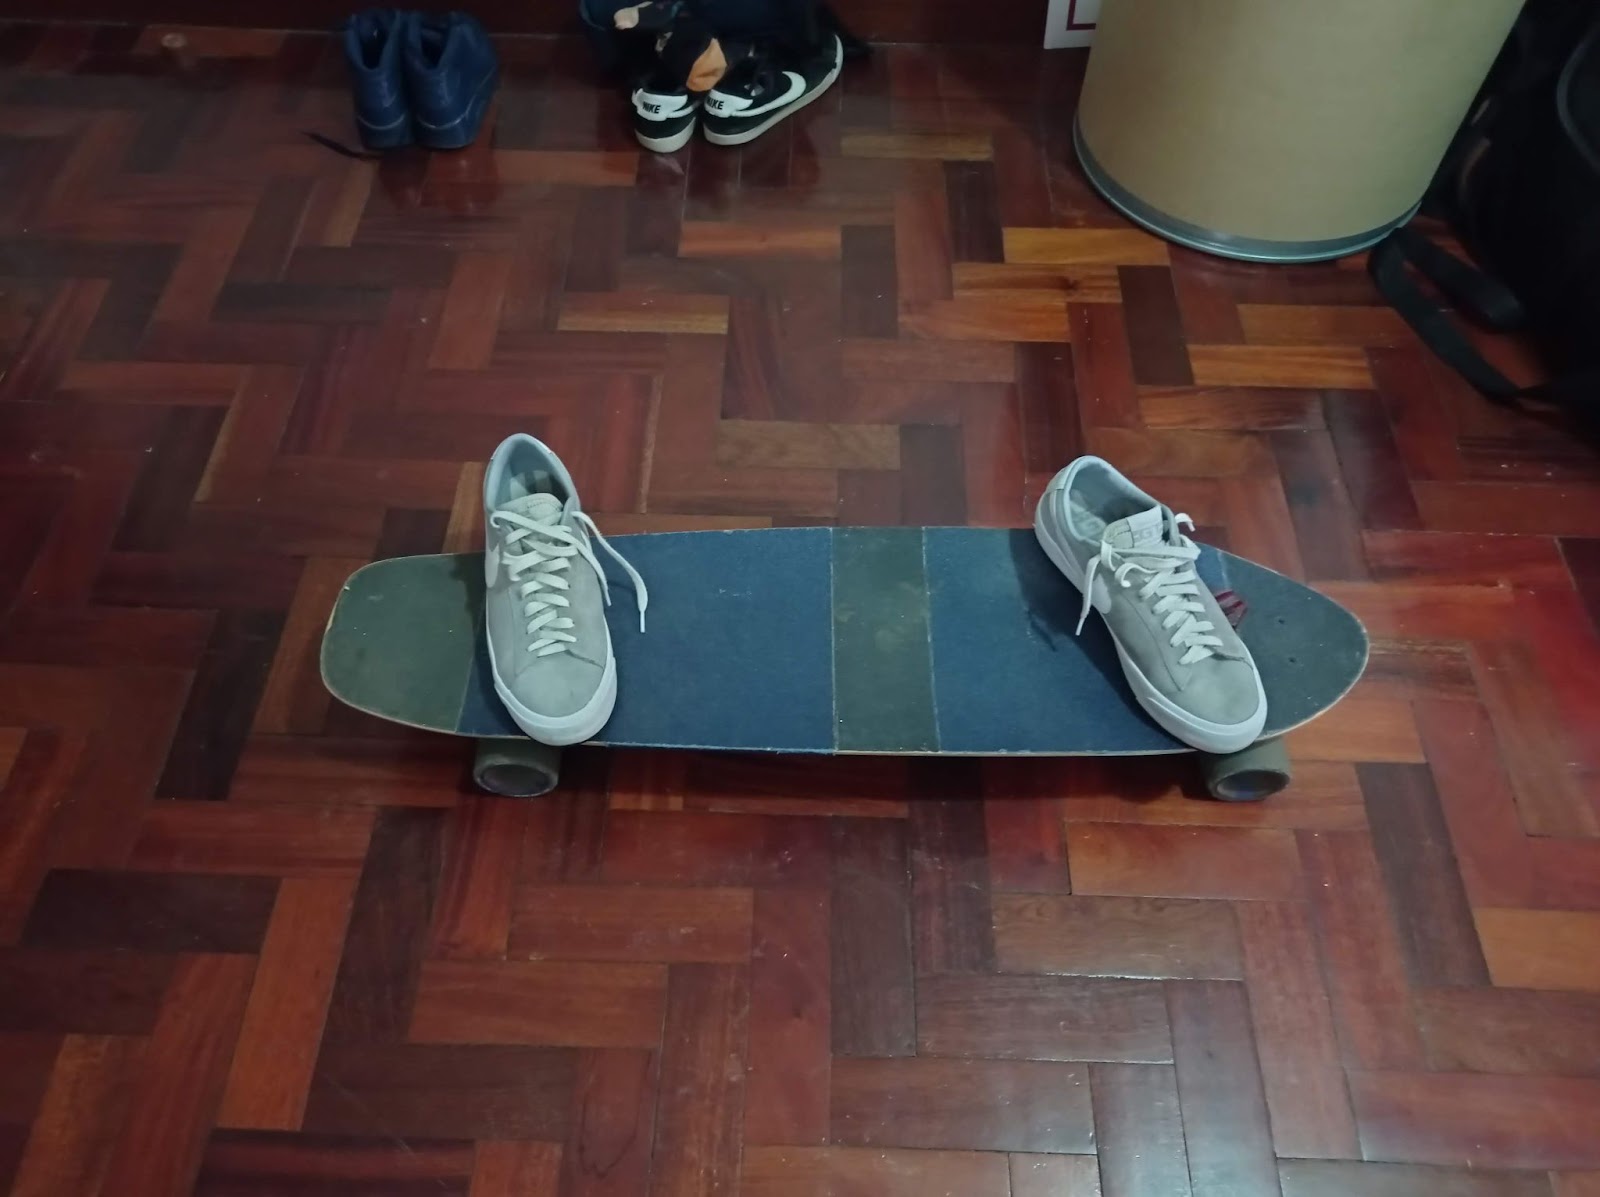
You’re going to want to have your front foot near or over the front truck (maybe near the trailing bolts), and your back foot near or over the back truck.
You’re going to want your feet to be no less than shoulder-width apart.
Having both feet over (or near both trucks) will allow you to “man-handle” the board and get it to slide out. Man-handling requires less technique and finesse – which are things that will naturally
come with time and practice.
You’re going to want your feet to be near the rail of the board.
Step 1 – Practice the push-up slide positions off the board
This is just to see how it feels and get a good idea of what position your body is going to be in. Use this as a reference point when actually sliding.
There are two positions you’re going to want to practice.
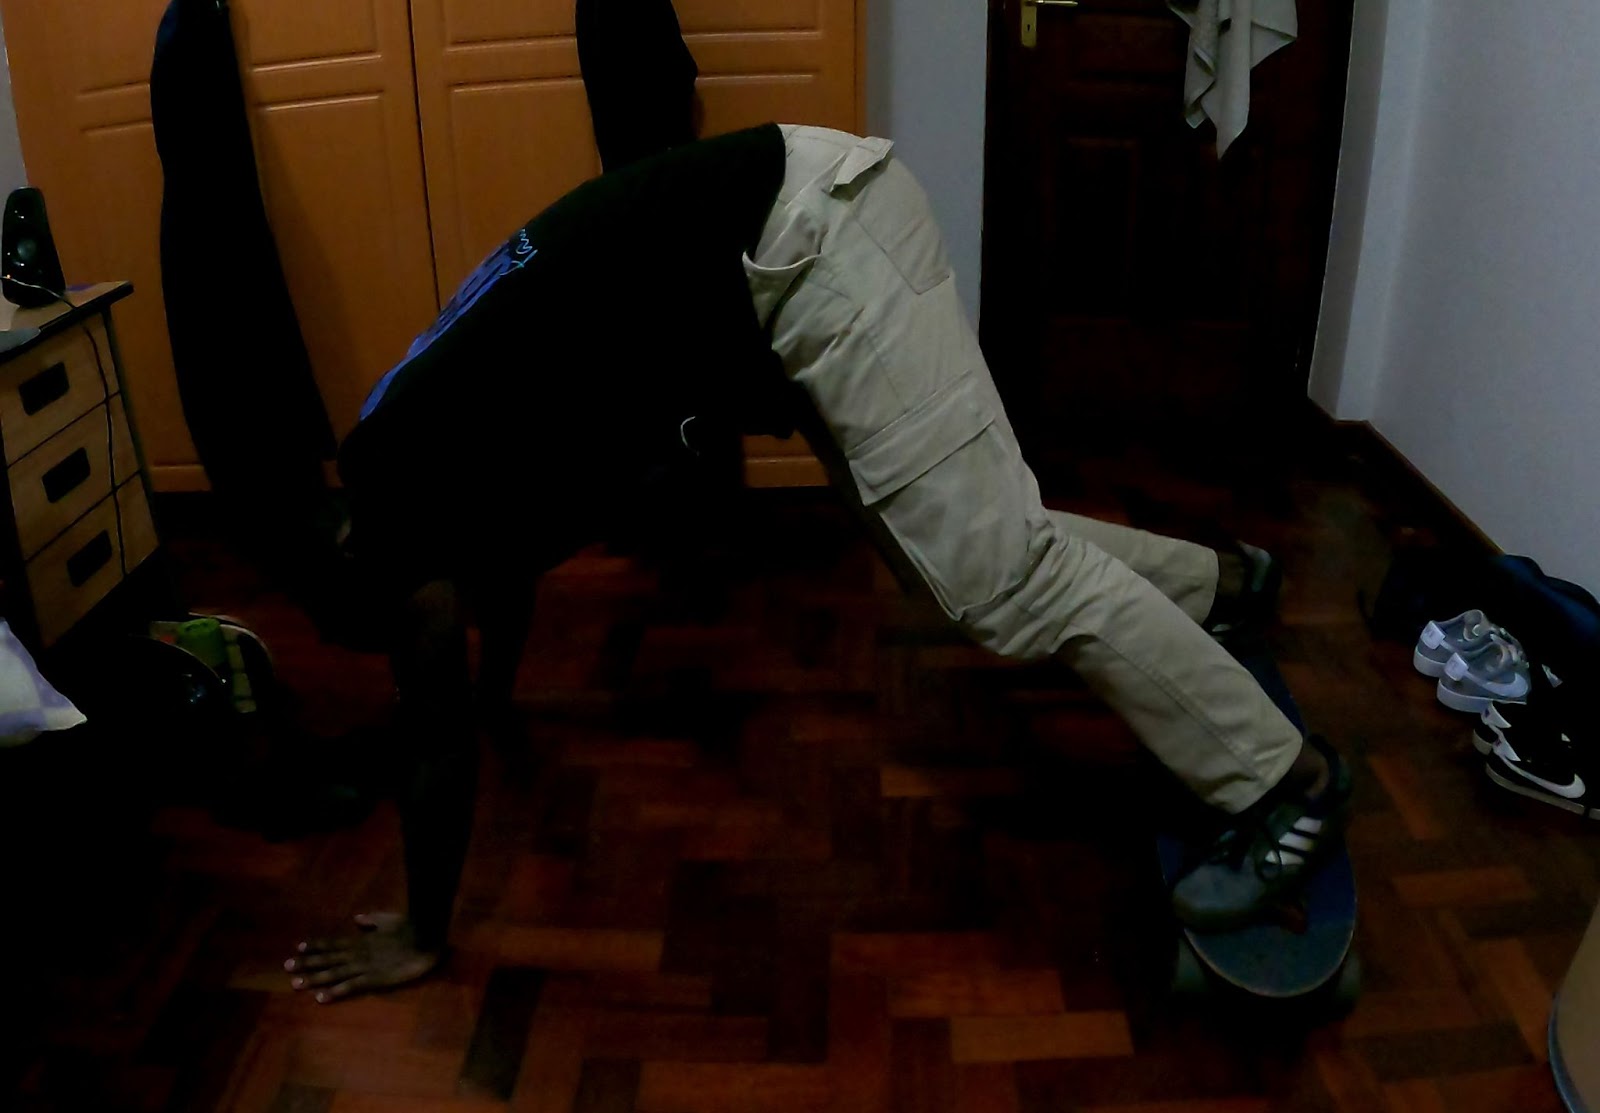
- Practice the positioning step 6, for when you initially put your hands on the ground. You want to have your hands over your knees and ahead of them (with your hands about shoulder-width apart).
- Practice the actual push-up slide position. Your hands are going to be directly under your shoulders … it’s basically doing a push-up with your board under your toes.

Step 2 – Start riding baby!
Get on your board, start cruising and carving, and vibing and warming up.
Step 3 – Start rolling down the hill
Start rolling down the hill or push into it. You need to have a bit of speed. I’m not sure how fast, but quicker than jogging pace.
Step 4 – Carve heelside
You want to carve towards the side of your heels, with your arms outstretched and palms facing outwards.
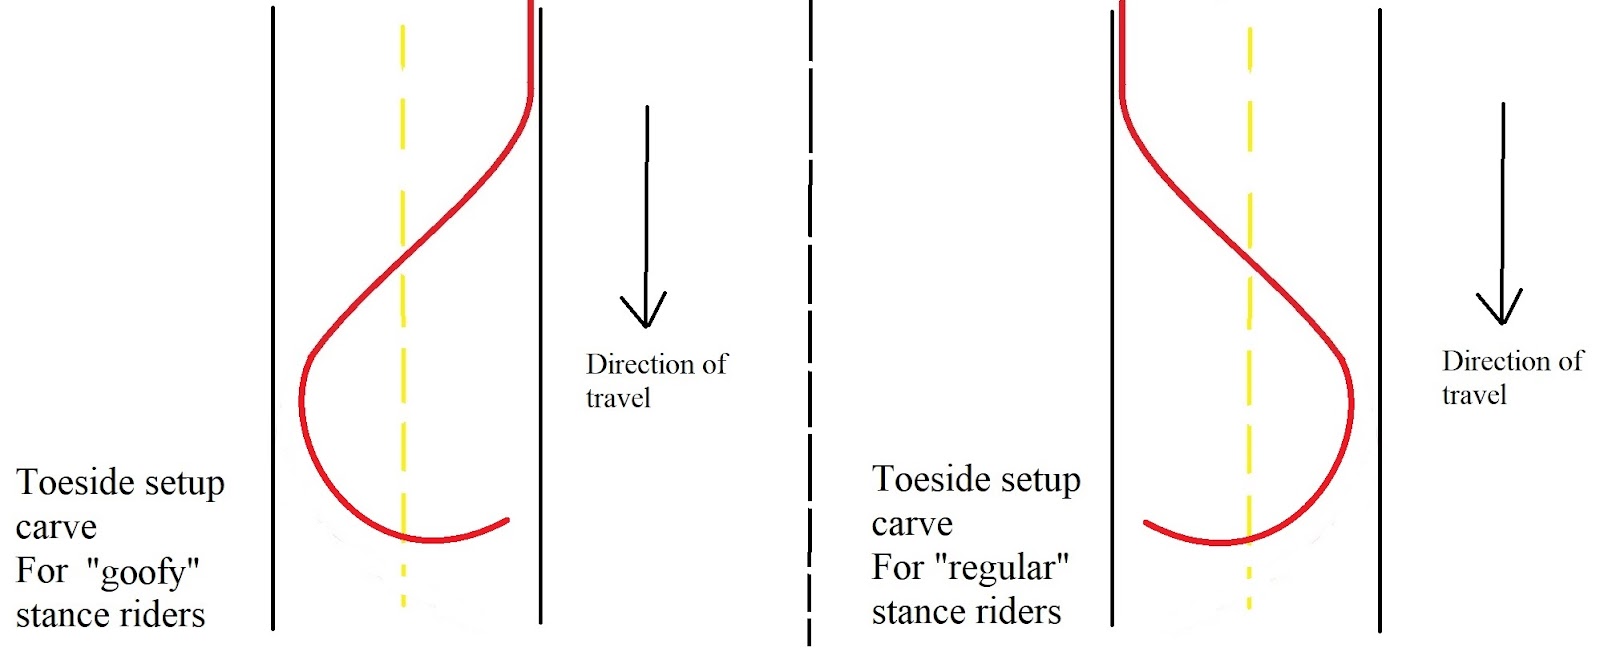
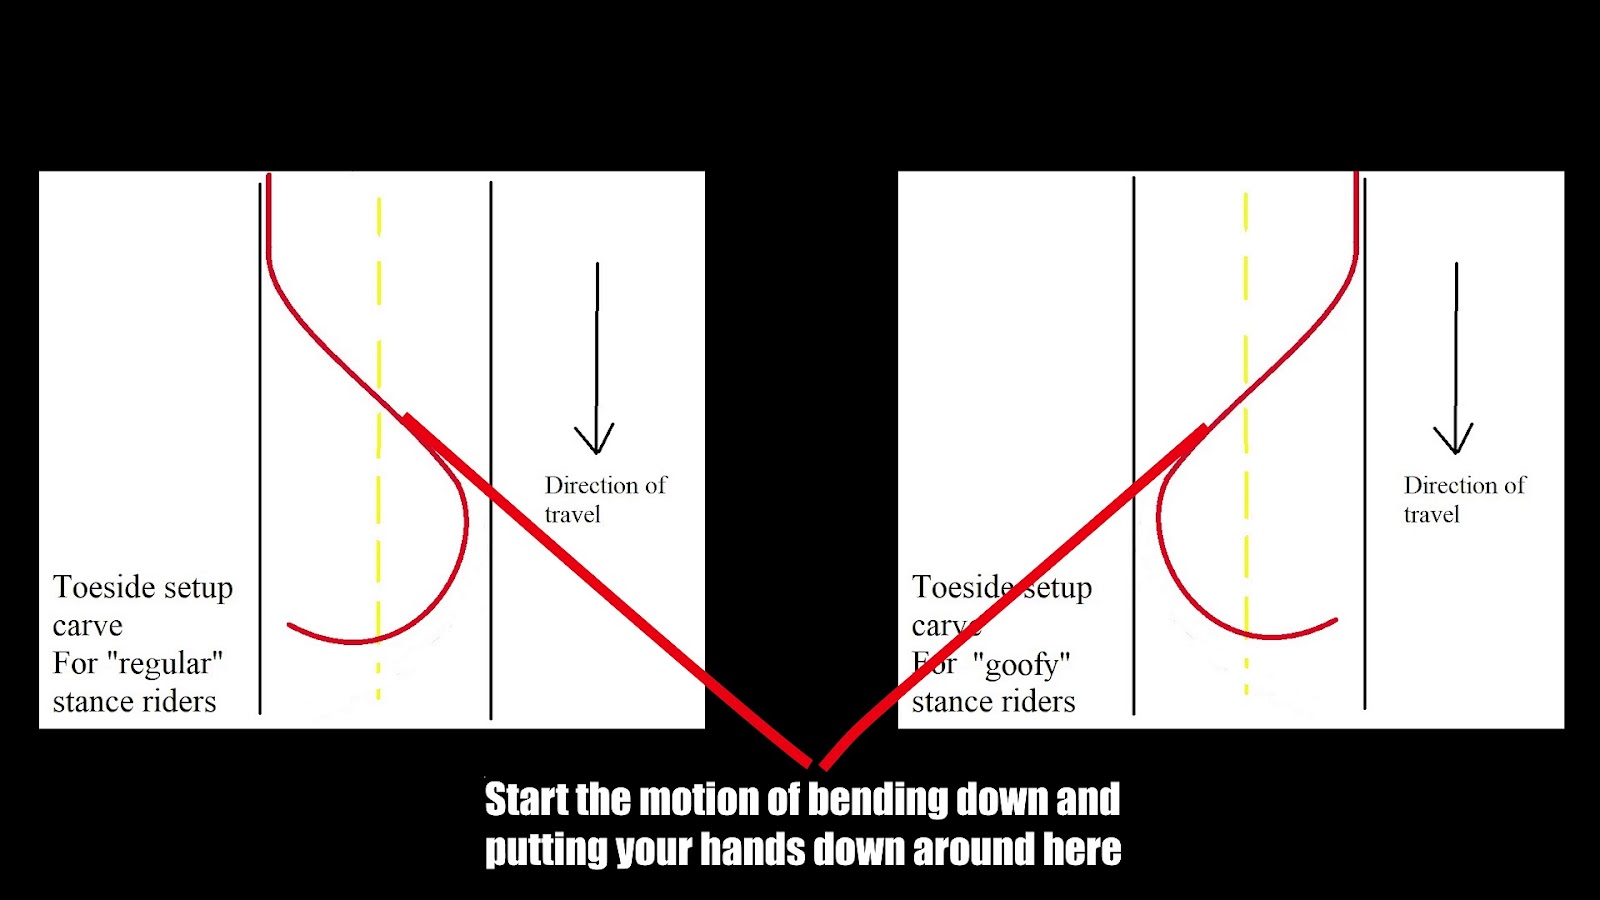
Step 5 – Start carving toeside
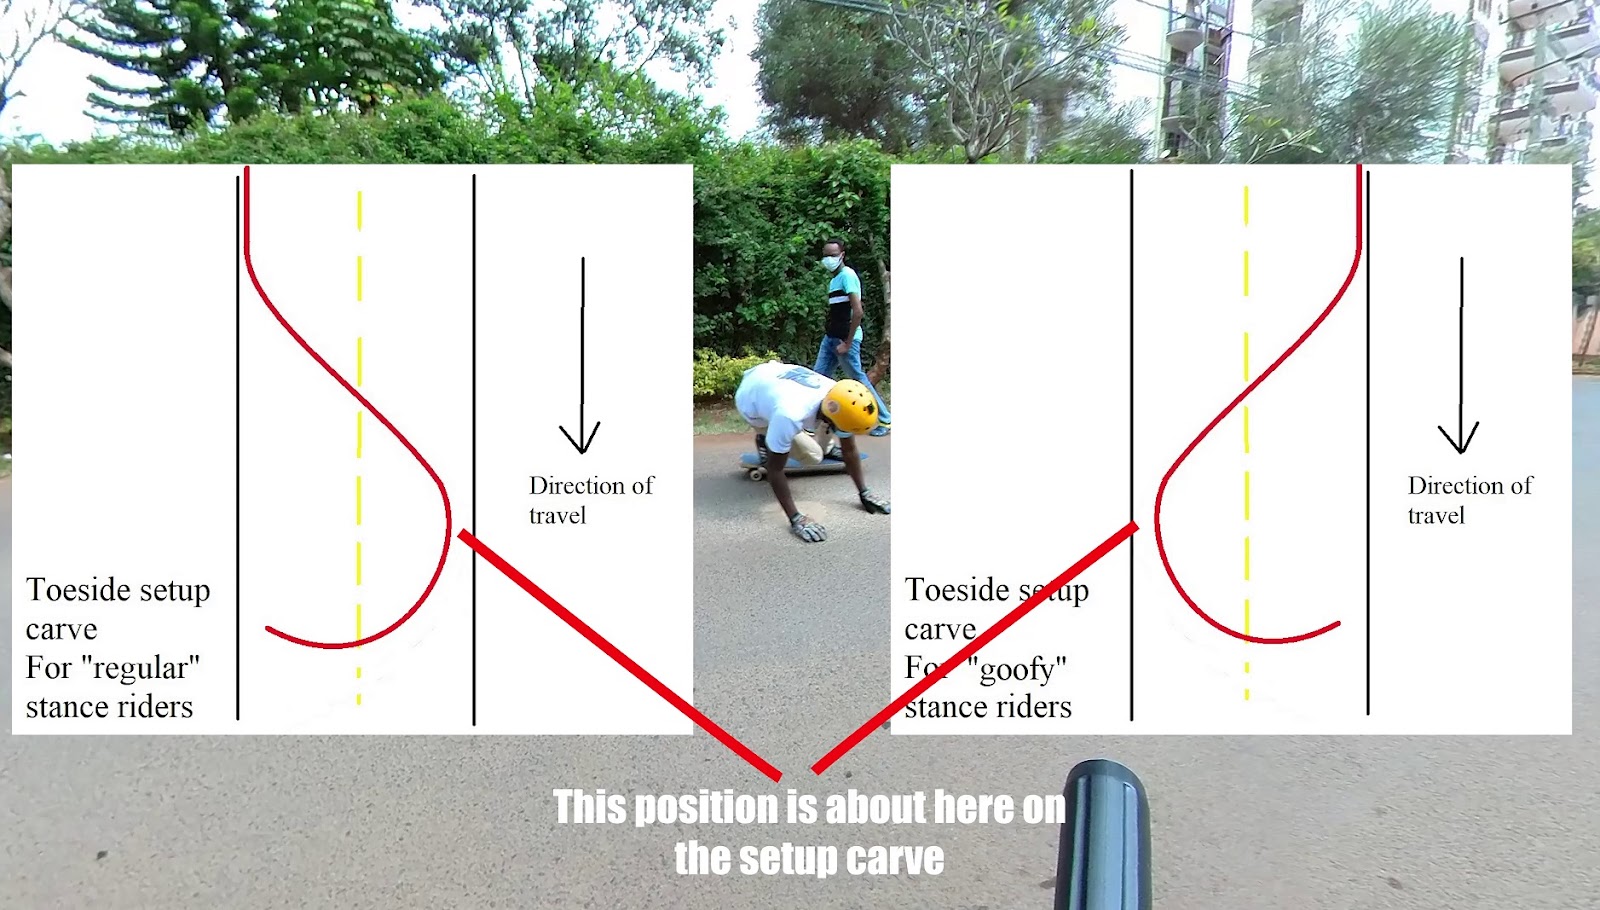
Now carve to the toeside. The goal is to sort of do a half S shape (makes sense if you’re regular stance) with the heelside to toeside curve, and then you start trying/doing the slide when you get midway to the top of the S.
Step 4 & 5 are what is known as a setup carve. Check out an illustration of this concept below.
Step 6 – Put both gloves down
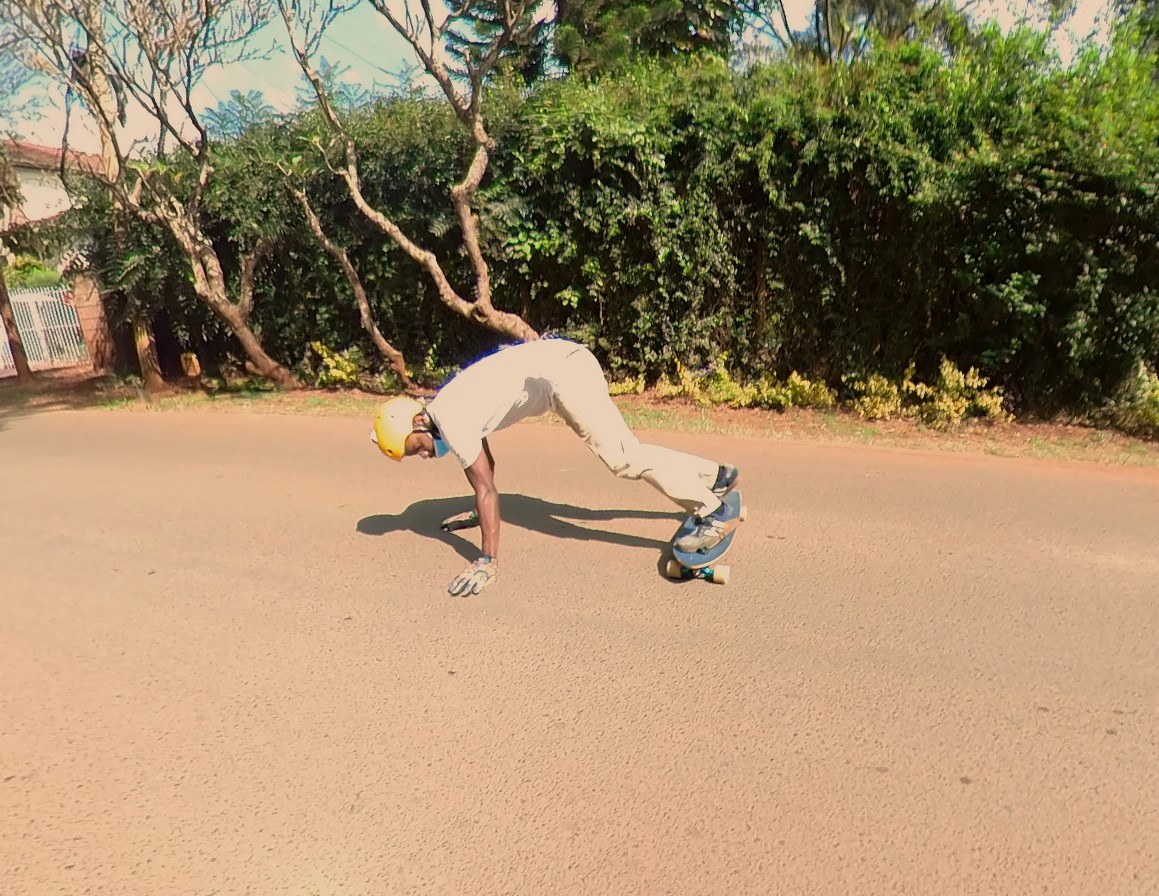
Bend your knees and place the pucks on the ground. Your trailing hand (your right hand if you’re regular and vice versa for goofy), might touch the ground first.
At this point, you will be bent over, palms to the ground, but not fully outstretched.
You also want to have a significant amount of weight (30-50%) on your hands. Not having your hands too close to the board will also make this easy to do.
*Pucks may cause you to slide away from your board, so don’t put too much weight on them. Or at least mentally prepare yourself to fall once or twice as you get the balance of how much weight to put on them.
*Also the more you practice this, you’ll be able to use the motion/momentum/rotation of your shoulders from putting your hands to the ground, to help you get the wheels to break traction. This is all done in one fluid motion and it will come with practice.
Step 7 – Push (or swing) the board out
From that bent position with hands on the ground, you can now kick the board out. It’s basically pushing it out (the board) to get yourself into the proper push-up position.
You’re initially going to want to push with your back foot whilst keeping your front foot firm and planted. Once you feel the wheels break traction, you can then push out with both feet and extend yourself into the push-up position.
Yes, you’ll push out with the front foot too, but it will also remain firm – if it doesn’t remain firm, it will be very easy for the front wheels to grip up, or the back to over-rotate. A few other things can go wrong too. But yeah keeping your front foot firm is key to getting the board to slide.
**With practice you’ll be able to get this into one fluid motion. Initially, it will feel really awkward. You’ll have to practice getting the board to break traction and then pushing out. With time you’ll be able to make this into one deliberate motion.
When pushing the board out, really dig into the rail. Try to push out with both feet. Be firm. Be deliberate.
Make sure you have enough weight on your hands otherwise it will be very difficult to kick the board out. You might want like 60-80% of your weight on your hands.
Common issues
If the board keeps going straight and leaving you behind, you likely aren’t keeping your front foot planted enough and you aren’t getting the board to have that initial break-in traction. You might need to be more aggressive with how quickly you put your hands on the ground and kick out. You might have to put more weight on your hands. Or you might have to have a more exaggerated setup carve so it’s easier to kick out the board.
Try these things and one of them might stick and solve the issue.
The other thing is just to keep trying, and you might have a breakthrough… it’s how you progress with these things most of the time tbh.
And of course, remember to check out the troubleshooting and tips section for more helpful info.
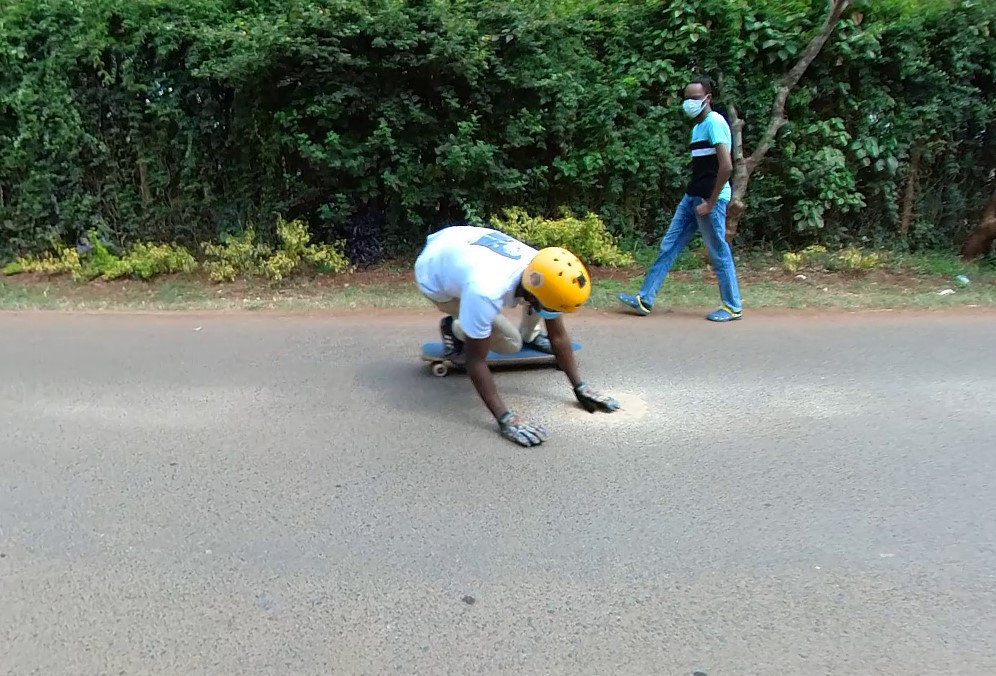
Step 8 – Hang in there
At this point, if you just remain with pressure on your toes, the board should keep sliding and you should come to a stop. Just hang in there and let it do its thing and you should shave out most of your speed.
The goal of this tutorial is to get you to come to a stop reliably. If you can do that through this slide, congratulations. You’ve done it.
Step 9 – Getting back on board (Optional)
*Try this after you’ve slid to a stop a few times and have an idea of how it works.
With the board sliding, you can then swing it back by releasing pressure from your back foot (your front foot remains firm-ish), and allowing the board to get sucked back under you.
Though as you’re releasing pressure, you still need to be firm and in control of the board.
This should rotate the board, and as it comes under you, you need to twist your hips and absorb the hookup force.
At this point, you might regain traction, and you might be in a bit of an awkward position with your hands on the ground. Your job is to now awkwardly trying to get your hands off the ground.
*You may not straighten out, regain traction perfectly and keep going straight, so don’t worry if you hook up diagonal or at an angle to the direction you were originally traveling in. Most people never end up out straight when coming out of slides anyway.
*This is actually a pretty difficult thing to do, so I’d advise you skip it altogether tbh. But if it works you’ve basically learnt how to pre-drift … with two hands ..
Step 10 – 180 slide? (optional)
Some people swing the board out and get it to do a 180. They then use that momentum to get up from the ground. They keep moving forward, but now in switch as their body and board has done a 180. The key to this is pushing out with your back foot and swing yourself. It will take some practice but is well worth it.
The steps outlined above of getting yourself off the ground will be useful here. Momentum is key and you want to be swift, using the swing from the 180 to help you bring your upper body off the ground.
Tips for the push-up slide
Tip 0
You’re better off being aggressive and going for it – especially if you have protective gear (helmet, knee pads, gloves, elbow pads).
You will fall, but it won’t be that bad as you’ll be fully protected. I also think you’ll learn faster as you’ll find what works and what doesn’t quicker than someone who is being too coy and no committing to trying.
Tip 1
Flexibility – do some toe touches to get limber.
Tip 2
Pressure on your toes, really dig into that board and that rail. You can place your back foot on the rail to help get more leverage to push the board out.
Tip 3
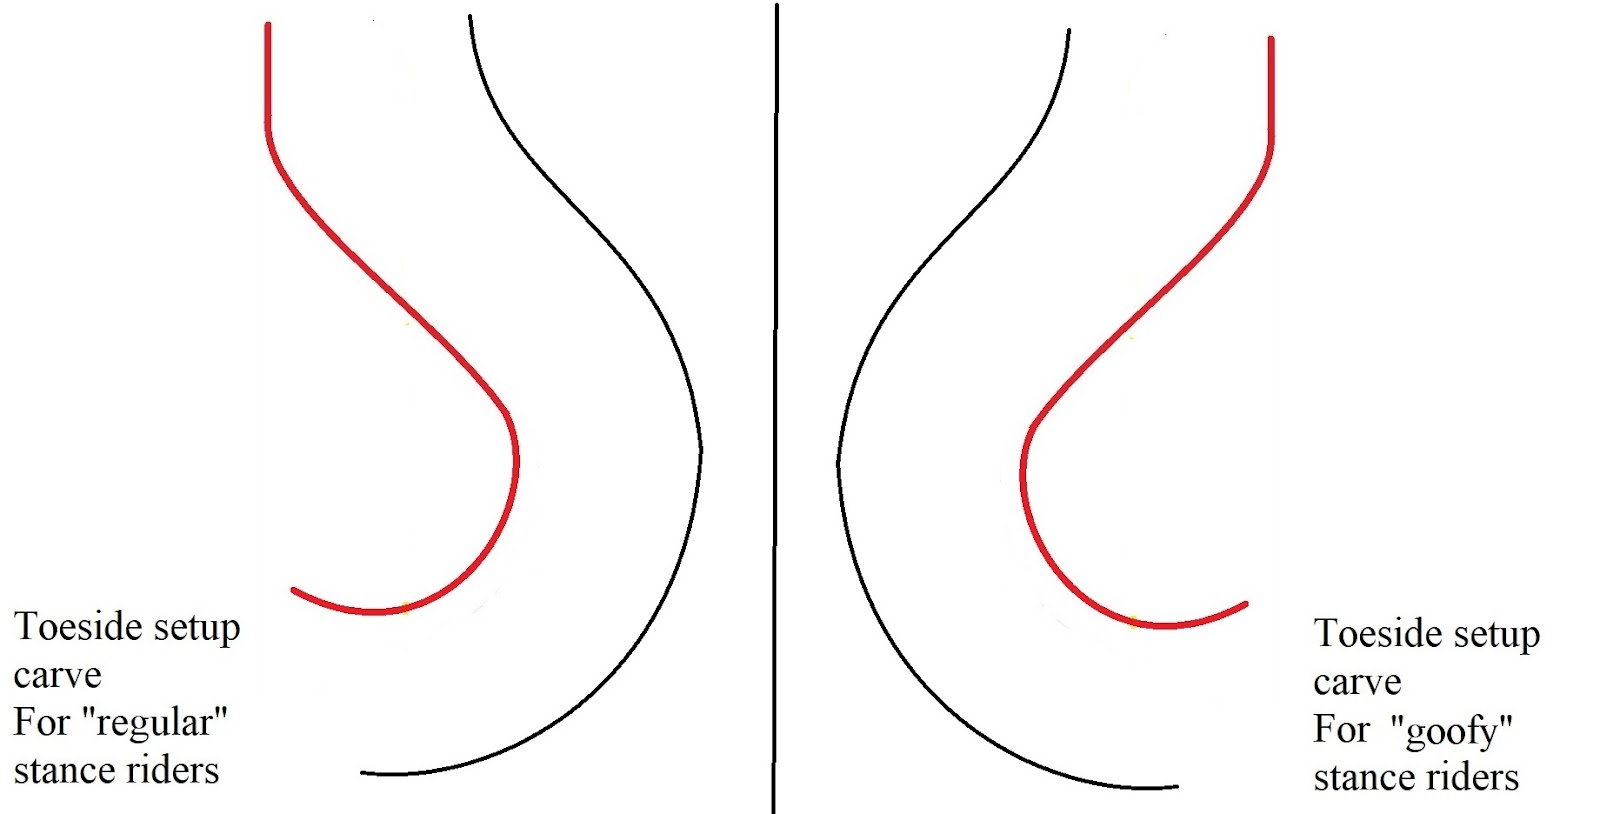
If you can’t do the carve consistently, you might have some luck drawing the half-S curve on the ground with chalk and trying to follow that. You want to draw two lines so you can skate within the lines. Pic below for reference. Just do a blown-up version of it.
Tip 4
Make sure you’re doing it on a road that is wide and has a lot of room.
Tip 5
Get wheels that are good for sliding.
Tip 6
Don’t put your hands too close to the board. If they’re too close to the board you might not be able to put sufficient weight on them. The board will be a lot harder to slide if you have too much weight on your feet.
By keeping your hands ahead of your knees
Troubleshooting
- Don’t throw yourself off the board, your feet need to remain in contact with it.
- You need enough speed – a mellow hill or a strong push will be needed to pull this off.
- Don’t throw yourself off the board, don’t just fall off. You have to set up carve and bend sorta gently into getting your hands on the ground.
- You might not have enough upper body strength to hold yourself up in the push-up position – might be something to work on.
- Bend your knees!
- You aren’t pushing hard enough with your feet.
- Do your feet keep slipping off? You might not have coarse enough grip. Coarse grip makes it easier for you to dig into your board and keeps your feet from sliding off.
- You might have more luck being more aggressive.
After learning …
After getting the push-up slide down, it will be very easy for you to do a one-handed toeside slide. Just do the slide as normal, and whilst you’re hanging in there in the slide, lift your front hand and look down the hill – you should be doing a one-handed, glove down toeside slide. Keep practicing this, then eventually try to do it without starting with both hands down.
This guide is part of the downhill skill progression guide. Check out the guide if you want to learn about which skills you need to learn for downhill skateboarding.
What do you think? Was this guide helpful?
Big thanks to all my patrons for the support – David, Squirrels Adventures, Mike, Jed, Mowgii, Jan, Josh, Jay, Bryan, Owen, Daniel, Alex, Kasajja, Leah, Helge, DeLacoste, Connor, Josh, Mike, Anthony, Ismail, and Justin. I couldn’t write articles like this without you guys’ support