Recently I’ve been coming across a bunch of posts from people on the internet unable to properly balance on their skateboard and the skateboarding basics, so today I’ll be talking about how to do so among other skateboarding basics. I’ll be going over foot positioning, how to place your weight, how to turn, and how to stop. If you try all my suggestions below, you should be able to comfortably skate within minutes. And if you practice them, you’ll be skating fast in no time at all.
This is the second in a series of articles and videos geared towards beginners. I’ll be discussing tips, gear, techniques, and other small things beginners have issues with. Check out the other posts here:
- How to tuck: Downhill skating basics
- The guide to safe downhill skating
- How to setup your trucks for downhill
- Best wheels for learning to slide
- How to pick your first skateboard for downhill skating
Keep an eye out for the other posts that will follow. Alternatively, follow my social media accounts.
Skating Basics: How to balance on your skateboard and push
How to stand on your deck and keep balance
Foot positioning is the most important thing
Foot positioning will determine how you turn on your skateboard. It will also determine how you balance. If you do the wrong thing you will end up unable to turn and balance properly. Skating will then feel uncomfortable, unnatural, and difficult. Read on for tips on how to position your feet.
Foot positioning when standing on deck
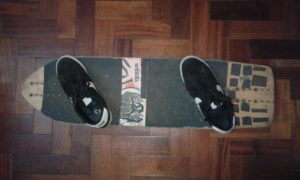
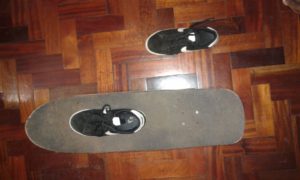
You want your feet to be at an angle that is 50-90* off the centreline of your board. *Imagine the centreline as this line that cuts through the middle of the board from the nose to the tail.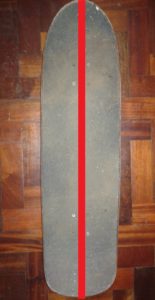
You want to have your toe touching the rail of one side of the board and your heel touching the other, with the middle of your foot over the centerline. This position gives you the best leverage to take turns and balance effectively. I also find it most comfortable to be in when rolling. It also feels easier to balance this way as the center of your foot (where most of your weight tends to be) is over the centreline – where the best balancing is.
Beginners often have their front feet in awkward positions. Some have them straight, some have them off the centerline, etc. It often leads to them not being able to balance and effectively control their skateboard.
Foot positioning when pushing
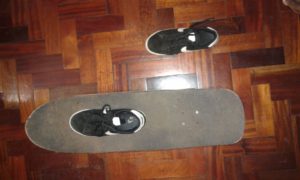
When pushing, you basically want your lead leg (front leg) to be over the centerline of the deck in a straight position (or facing the nose of the deck).
Because it’s over the centerline, balancing shouldn’t be so bad. When your foot is to the left or to the right of the centerline, it tends to turn the board in the respective direction. This will make pushing feel awkward and make you feel unconfident.
So for best results, have your front foot over the centerline. For more tips on how to push, read the “How to Push” section below.
Where to stand on your deck for the best balance
Where you stand on your skateboard is important. When starting out, you want your feet to be about shoulder-width apart, but this distance can increase depending on the length of your board.
You want your front foot to be either on the front mounting bolts or slightly behind them.
An ideal foot position on longer boards would be to have both your feet between the mounting bolts – but favoring standing closer to the front.
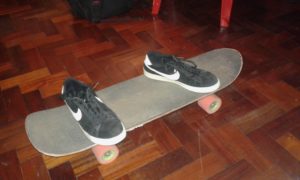
If you have a shorter board like a skateboard, you want to place your front leg over the front bolts and your back leg on/over the back trucks. Placing your back leg on the kicktails can make the board lift up and leave you behind. Whilst you can do this in-time, it will be a bit difficult for a beginner to balance on the board this way.
You simply want to avoid standing too far back on the deck. This places too much weight on the back truck which doesn’t give you good control. It will be like driving a shopping trolley backward. It could also lead to instability and wobbles when you start skating faster. Turning should come from the front of the skateboard for the best results.
Finally, you always want to have the middle of your foot over the centerline. No matter how your feet are positioned, having you the middle of your foot (where you weight tends to be focused) will give you good balance.
Focus your weight on your front foot/lead leg
This is the main thing most people get wrong. What they do is put too much weight on their back foot, which often leads to their board going forward leaving them behind – something that often leads to a fall.
The best way to visualize this is by simply putting more pressure on your front foot. If this doesn’t come naturally to you, you can lean into your leg and even bend it slightly to make sure you’re putting enough weight on it. If still can’t get it, that awkward “battle stance” e-skaters do when they’re taking off.
People often lean back because it feels more natural, or they simply do it instinctually. But this is a bad thing and a bad habit.
How to push properly
When pushing, you want to push with your back leg. If you push with your front leg you’re doing something called mongo pushing. This comes naturally to some people but it is a bad thing. You don’t get the best balance when pushing this way. You want to push with your back leg and leave your front leg on deck.
For your front leg, it is best to have it in a straight position on the deck – as described in the foot positioning section above. You focus your weight on the middle of your front foot and you try to keep the weight balanced and centered over it.
You also want most of your weight on the leg on deck. The pushing leg should simply be free to push.
When putting your legs back on board you need to get them into the right positions. You start by placing the back foot in the right 50-90* position. Then shift your front leg from the straight position into a more comfortable 50-90* position too. As you shift your leg, you need for a brief second to place more weight on the back. If you’re back foot is balanced well, this shouldn’t be an issue. Try to make the movement smooth – but if it isn’t smooth that’s ok too. Just stay relaxed as you do this.
The above action will take some practice. But once you get used to it, it will feel more natural.
How to slow down
You can try carving
Carving is the motion where you turn deeply to the left and then turn deeply to the right. This increases the travel distance of your board, slowing you down and shaving off some speed.
Some beginners may find this challenging. To turn, put pressure/weight on either your toes or heels to turn in a respective direction. To turn deeper, bend into the motion and into the respective direction.
Carving is good to shave off speed but it won’t bring you down to a stop. You’ll have to either foot brake or jump off your board to stop completely. I don’t recommend jumping off your board.
Air braking
AIr braking uses air resistance to help decrease your speed. It makes a big difference at faster speeds and when coming out of a longboard tuck. It is negligible at slower speeds though.
*airbrake
How to slide on your longboard
Also known as power-sliding, you drift your wheels and the friction from the wheels sliding slows you down. It’s a lot harder than it looks. Not an appropriate way to slow down especially for beginners. It takes a long time to get to grips with it and to perfect your form. You may not even have the right gear to do it properly.
*sliding
How to footbrake
Foot braking is usually the best way to go about it. You place your back foot on the ground and the friction from your foot/sole reduces your speed. It is a very controlled way to slow down.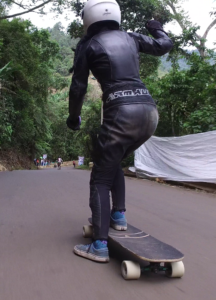
It looks and sounds easy, but it is actually quite difficult. And if it doesn’t come naturally to you, you’ll have to practice a few things off your board to get it right. Below are step by step tips to foot break.
- Shift your weight over to your front foot.
- You want your front foot to be facing 12 o’clock (or at an angle of 0* to the centerline).
- You lower your back foot down gently.
- As you lower your back foot into the ground, allowing the heel to be the part of your foot that makes contact with the ground.
- Place the heel down gently and hold that until you adjust to the friction with the ground.
- Slowly increase pressure/push into the ground to increase how much you slow down.
- Notice, I said push into the ground. Don’t increase the weight on the foot braking foot, this could lead to issues when getting the back leg back on board.
- Shift the weight back on to the leg on board.
- Step back on board and roll away.
How to get better at foot braking:
These exercises should be practiced off your board. If you can’t foot break, it is often because you can’t comfortably balance on one leg. Being able to lower yourself on your lead leg. Here are some things you can practice to improve that.
One leg half-squat:
- Find a raised platform.
- Balance on it with one leg – your leading leg when skating.
- Bend your leading leg to lower your back leg off the platform.
- Lower your back leg off the platform until it is almost touching the ground.
- Don’t let it touch the ground, just bring it as close as you can and hold for about 5 seconds.
- Make your foot as flat (as parallel) as possible with the ground. *I’ve noticed some beginners let their toes droop forward. Point your toes straight ahead and keep that foot flat.
- Lift it back up till your leading leg is straight.
- Repeat 10 times.
It might also be a good idea to do it on your stationary skateboard. It will help build up balance once the above exercise becomes too easy.
If you do this for a couple of days (a week), it should build up strength in your lead leg necessary for you to foot brake successfully. Try foot breaking the next time you’re on board and you should feel the difference.
All that’s left now is building up balancing in your lead leg. Unfortunately, there’s not much you can do about this off your board, you’ll simply have to skate and practice foot breaking. Though this is easily done at slow cruising speeds – if anything, you can always simply run off your board.
Troubleshooting
My deck turns on its own
Some skateboard trucks tend to lean/turn on their own. This might be a manufacturer defect or might happen for some reason. Usually, the problem goes away when you step on deck. However, it does persist occasionally.
If this is true for you, it might be time to upgrade your bushings or your trucks entirely. A truck refusing to respond to input could be a sign of worn bushings or a low-quality truck. Updating bushings usually improves performance.
My skateboard turns too much
If you have stock trucks they usually have stock bushings. These bushings they come with may not be appropriate for your weight. If you feel like your trucks turn too much, it’s a good idea to upgrade to some aftermarket bushings that will give you a stiffer, more stable feel.
Bushings are like the suspension of your trucks. They come in different durometers (hardness). The harder they are, the stiffer they make your truck feel. Your weight determines which bushings you get. The heavier you are, the harder a bushing you get.
You could also tighten your trucks, but that will affect the life and performance of your bushings. So I don’t recommend it.
There are also a bunch of ways you can make your skateboard more stable, I recommended checking out the linked article if you’re interested.
Was this article useful?
If you enjoyed this article and want to see me do more like it, I suggest signing up to my Patreon, or simply following me on social media!
Thanks to my patrons Mowgii, SuperbadJuJu, and Jed for the support!
Also, I have a video pending for this article. I think the article is more in depth and far more thorough than the video. However, I will make it if enough of you request for one.
Check out the other relevant posts here:
