Today’s guide is on the toeside stand-up 180. It will be the foundation for all the other toeside stand-ups you are going to do in the future, so I believe it’s a key skill to get down.
This guide is part of the downhill skill progression guide. Check out the guide if you want to learn about which skills you need to learn for downhill skateboarding.
What is a Toeside (backside) 180 stand-up slide?
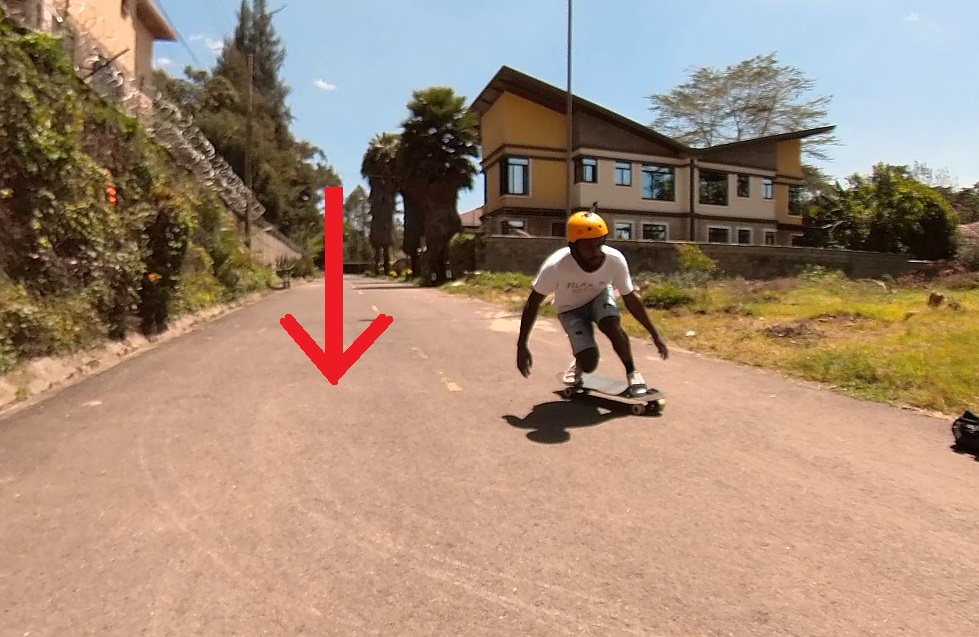
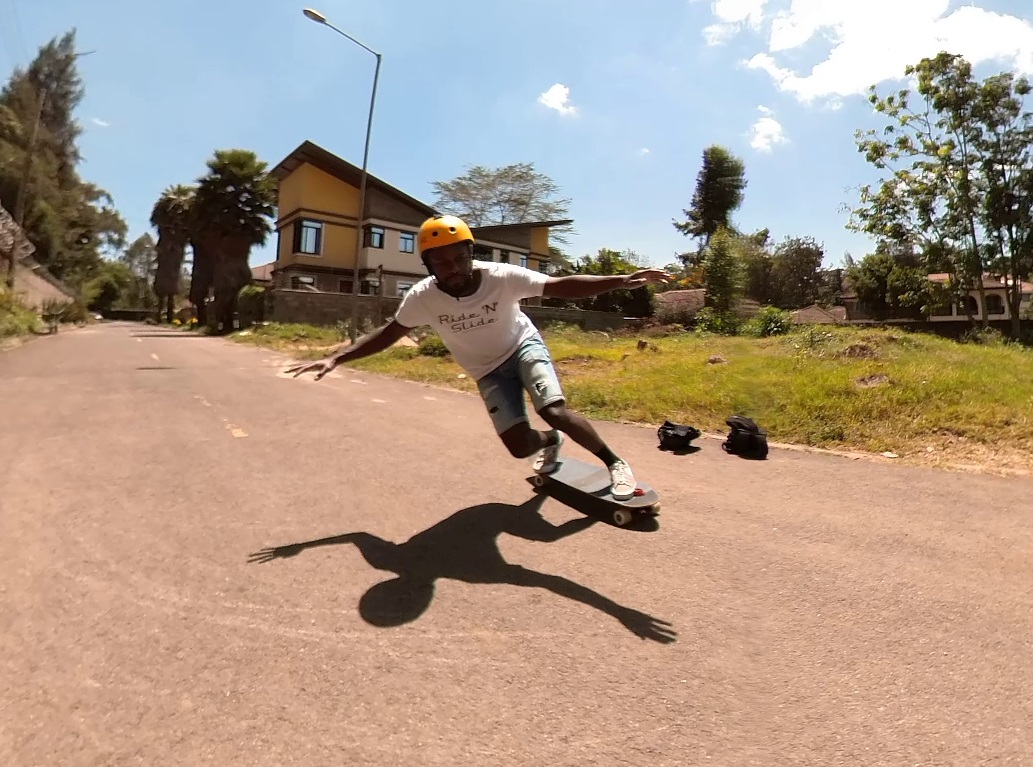
The toeside 180 slide is a slide where you rotate 180* with your shoulders facing up the hill, to end up in switch. The video below illustrates this.
What you should know before trying this slide
Before trying this slide, you should already know how to carve and how to slow down – either by foot braking or doing a push-up, Coleman, or a toeside pendulum slide. These are all reliable ways of slowing yourself down and you can do them if you get spooked.
You should also know how to setup carve (pre carve) for a slide. Setup carving will be key to getting the board to break traction. If you can’t do it, you will have quite a bit of trouble when trying to slide the board.
I also recommend you check out the other guides in this skill tree list I have made. This one builds off the progress, experience, and knowledge you gain from following the other guides.
Gear to have for this slide?
You should have a helmet, and slide gloves at minimum. I also highly recommend getting some knee, hip, and elbow pads too as you are likely gonna be falling a lot.
Having wheels for freeriding and sliding will also making your sliding attempts a lot easier and a lot more successful. But if you have already watched and bought a board according to my guide to beginners downhill skateboards, you should have one appropriate for this.
How to toeside stand-up 180
Two ways to learn this
The first loads you up like a spring, and as you unwind, you throw out your shoulders, simultaneously pushing with your feet. This makes you quickly rotate into a 180*.
The second is slower, requires more subtle movements from your shoulders, and allows your feet to do the bulk of the work.
If you learn the first method, you’ll have to unlearn, or learn some new things to land toeside speed checks. It relys on your shoulders to lead the spinning motion. The 2nd is quite similar to what you do for a stand-up toeside speed check and is better for holding out big 180s.
The 2nd one is harder to learn admittedly, but if you learn it you’ll be able to learn the first pretty easily.
Step 0.1 – Foot positioning
Get the foot positioning and body positioning right before you try toesides.
The first thing to look at is foot positioning. You’re going to want your front foot to be near the front truck at about a 45* angle, or whatever is comfortable for you. What you’re going to want to do is at least have your toes near the toeside rail so you have enough leverage when it is time to slide.
I prefer my foot to be at a 45* angle and even straighter sometimes, but never too far from the rail.
You are then going to want your feet to be about shoulder-width apart. It will look like something in the picture below.
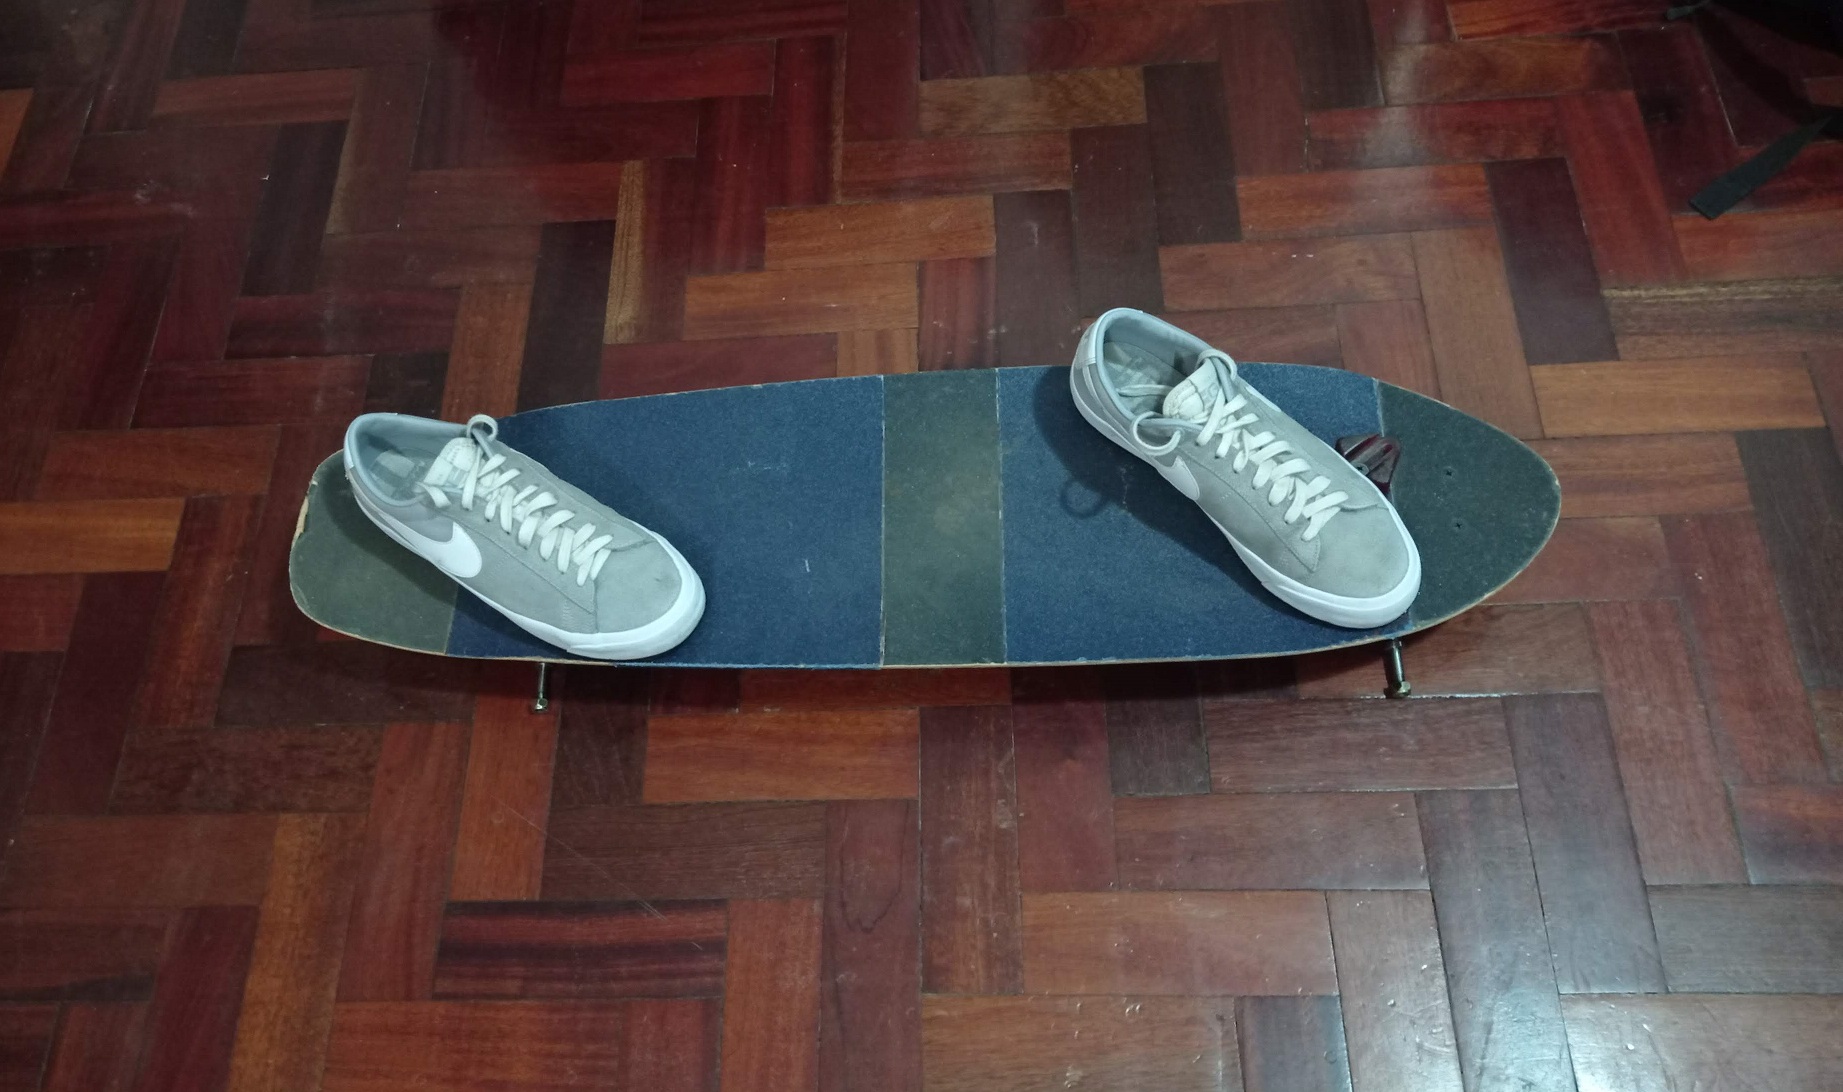
I advise you to have your back foot either in front of the back truck or on top of it. It’s also ok to have it on the middle of the board – if that’s where your shoulder-width stance places it. Finally, don’t have it behind the back truck unless you can’t help it.
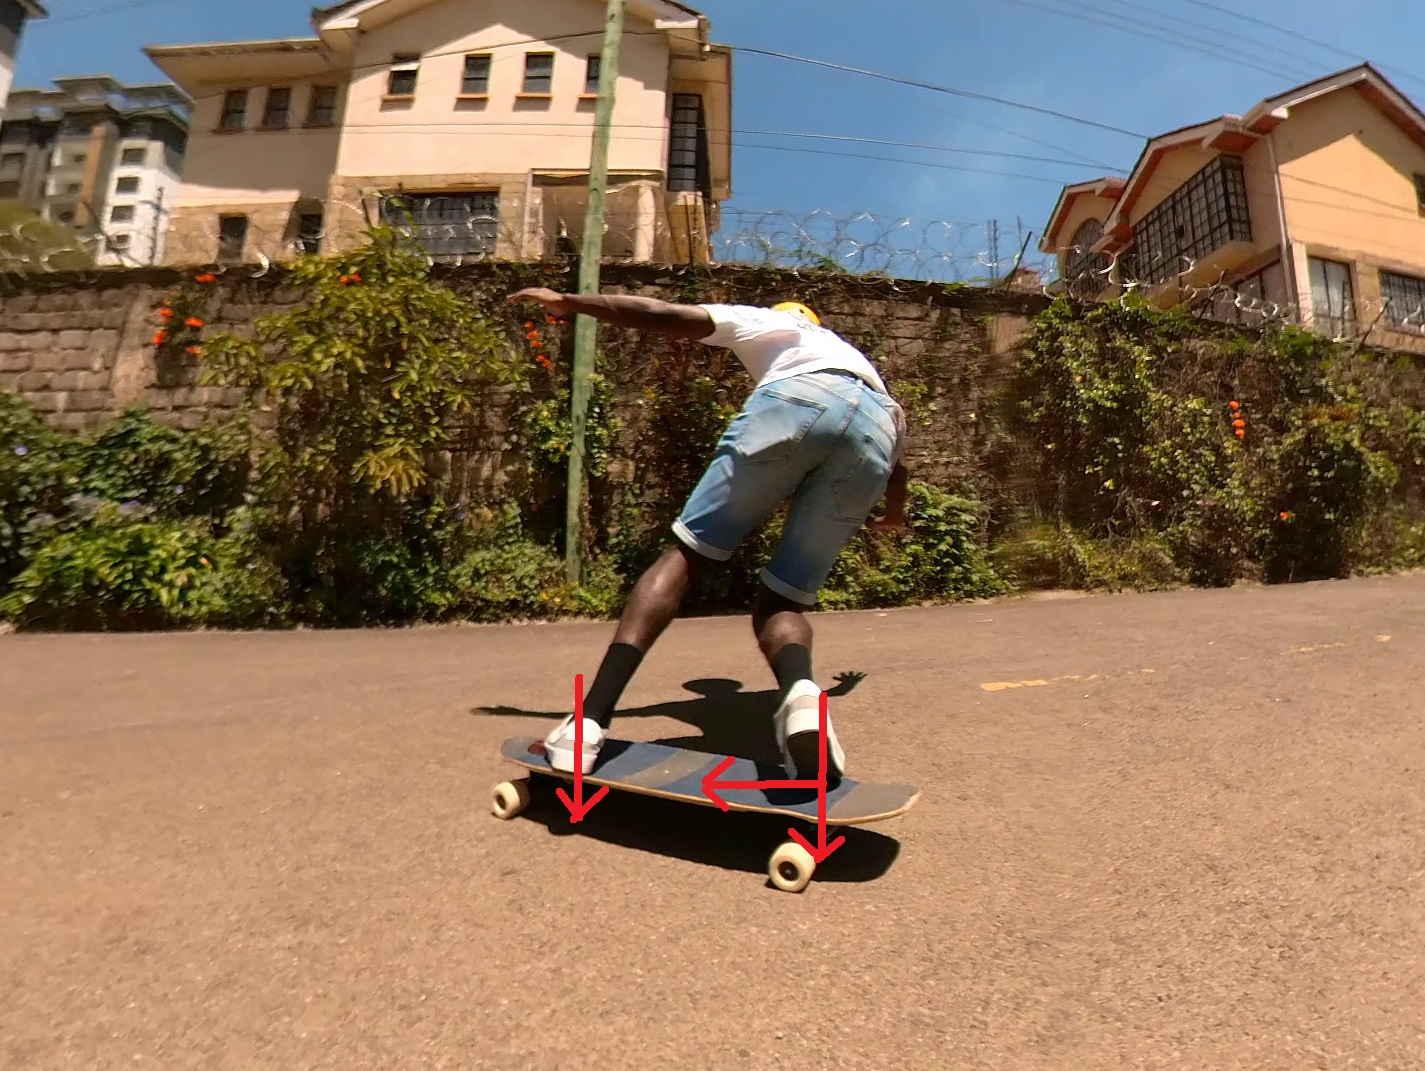
In terms of weight positioning, your weight should be on the places highlighted red in the image below.
Check out the video below for more information and an illustration of the foot positioning.
Step 0.2 – Weight distribution
You want to have about 70% of your weight on your front leg, 30% on the back leg.
Most of your weight is going to be on the balls of your feet/toes – rather the zones marked red in the image below.
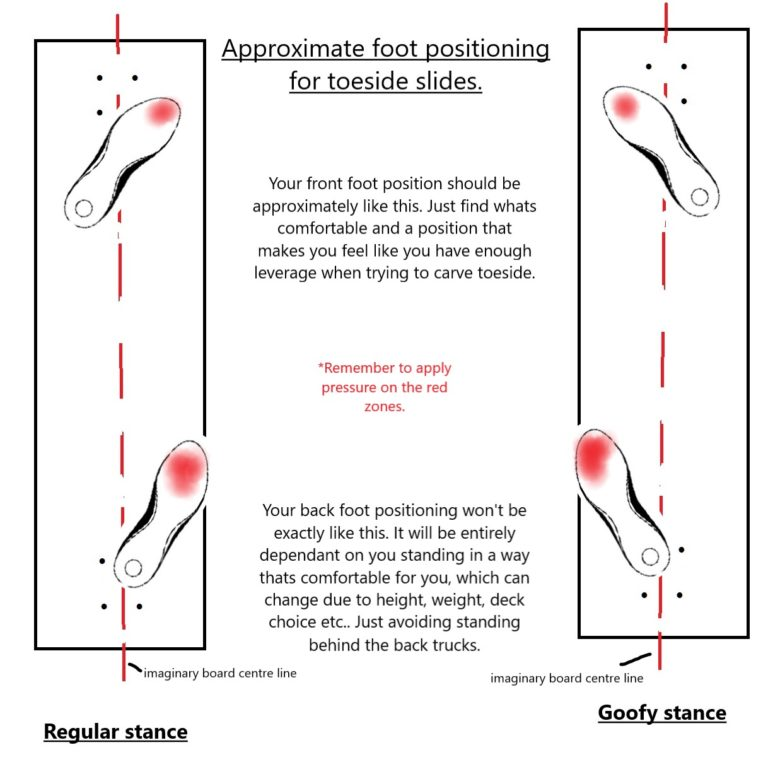
A big key for toesides is really digging into your toes with your weight. This will prevent highsides and give you a lot of confidence as a rider.
Step 1 – Speed
You want to be going faster than jogging pace. You can learn this on a mellow hill but make sure you push in fast enough. Also, the steeper the hill, the easier it will be to get the board to break traction.
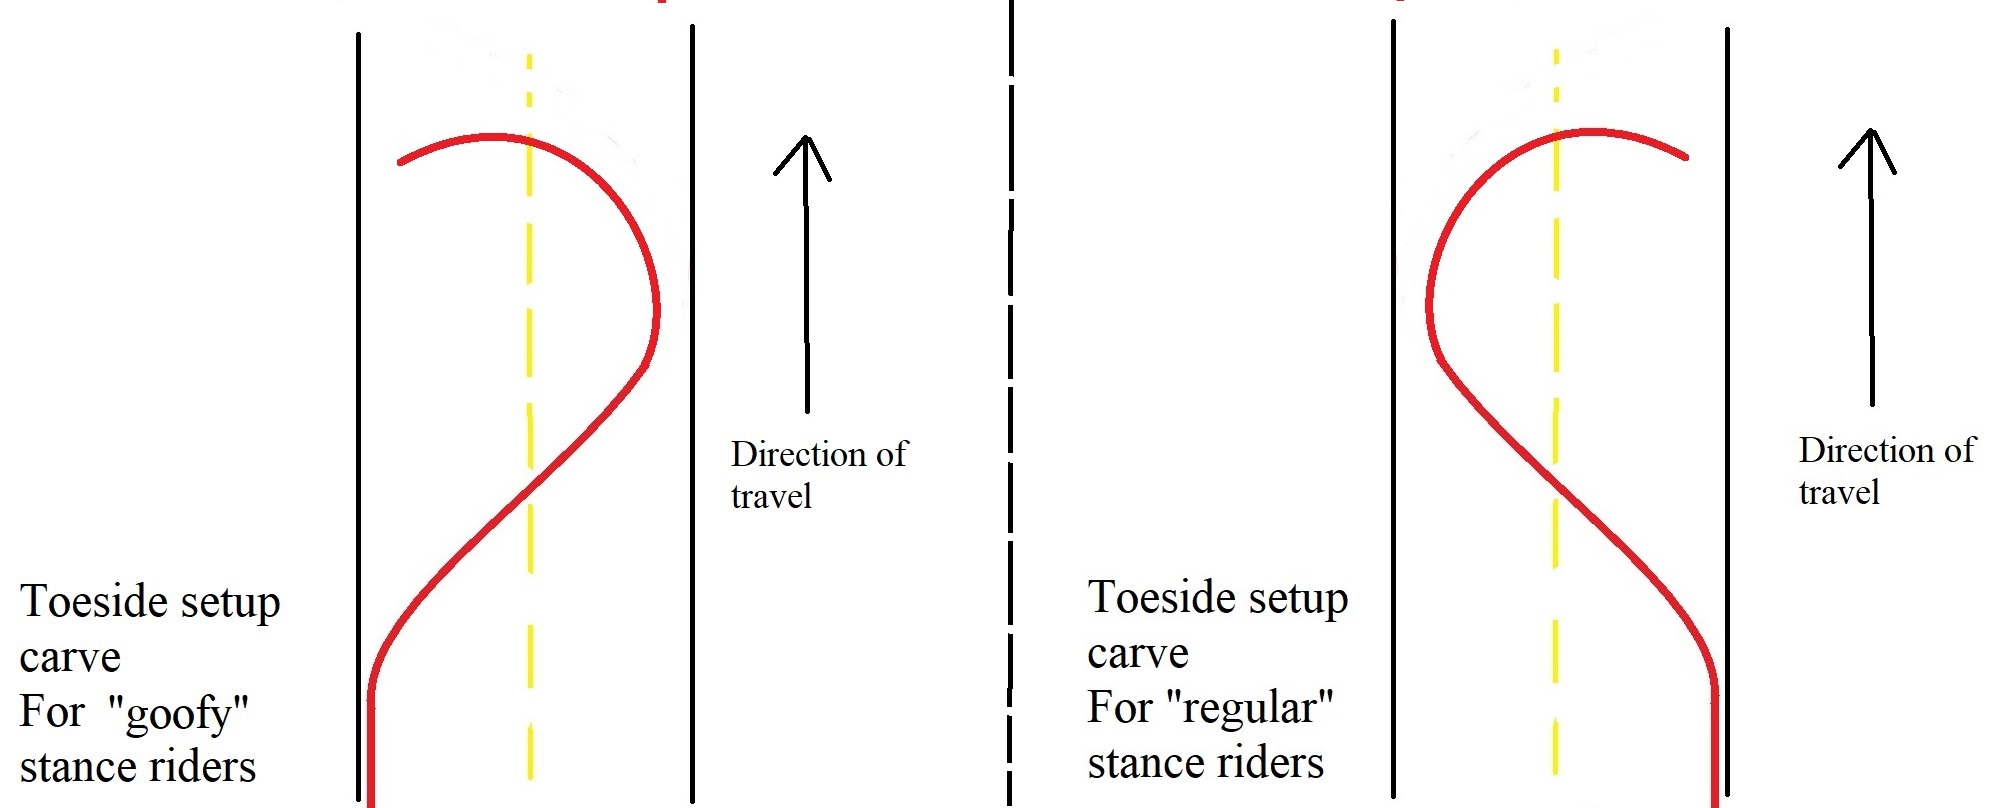
Step 2 – Setup carve is key
Setup carve will make your life easier, it’s important you do it. It naturally brings your wheels to that edge of traction where just a nudge will get them to slide.
Check out the setup carve guide for more info!
Step 3 – Compress
At this point of the setup carve compress in anticipation of the kick out/pushing the board into the slide.
Compression is just bending your knees and sinking into your board a bit. For toesides, I like to sink into my front foot and really put weight on the balls of my foot, especially the front one.
Step 4 – Decompress and kick out
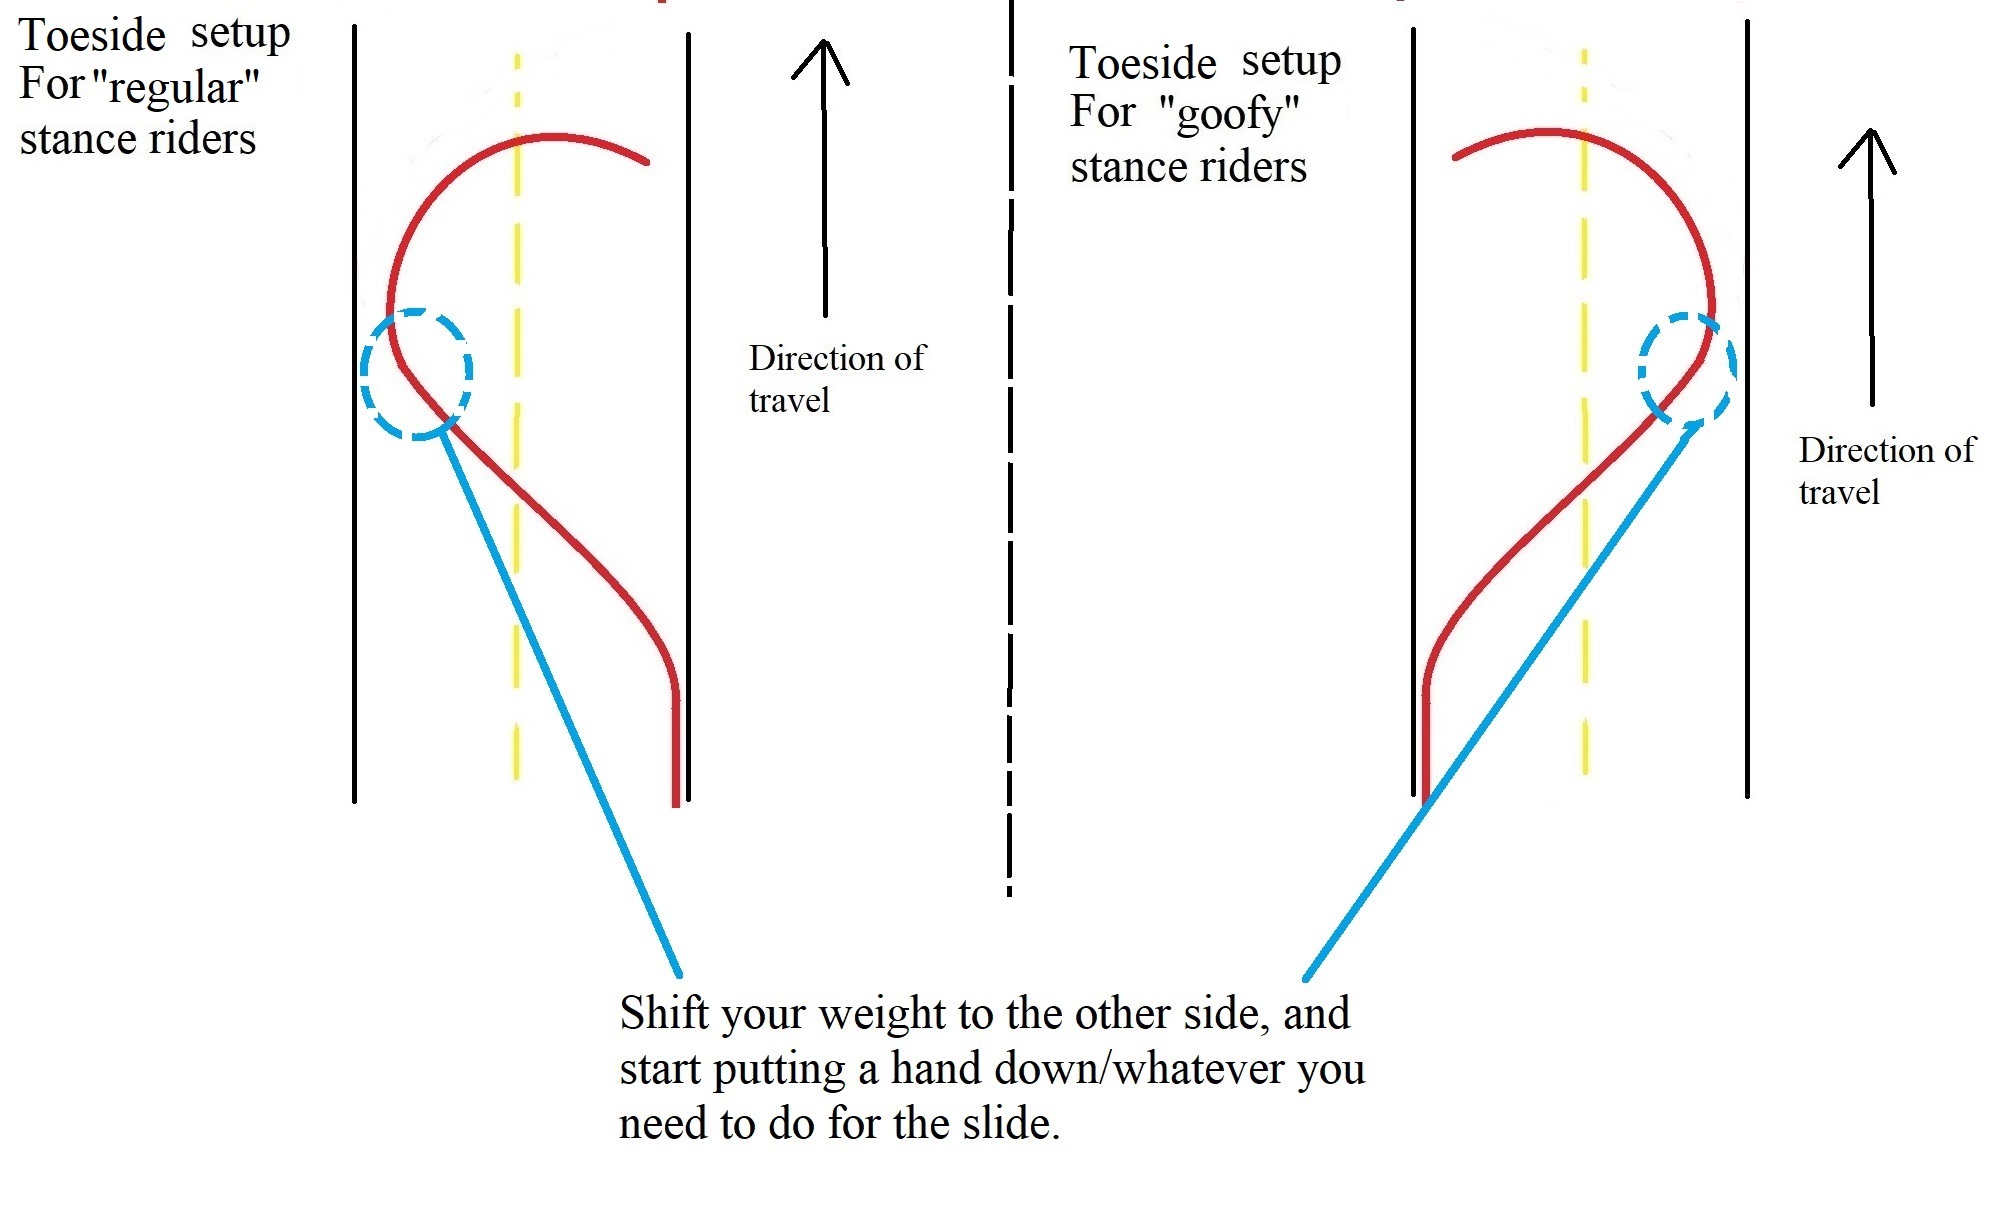
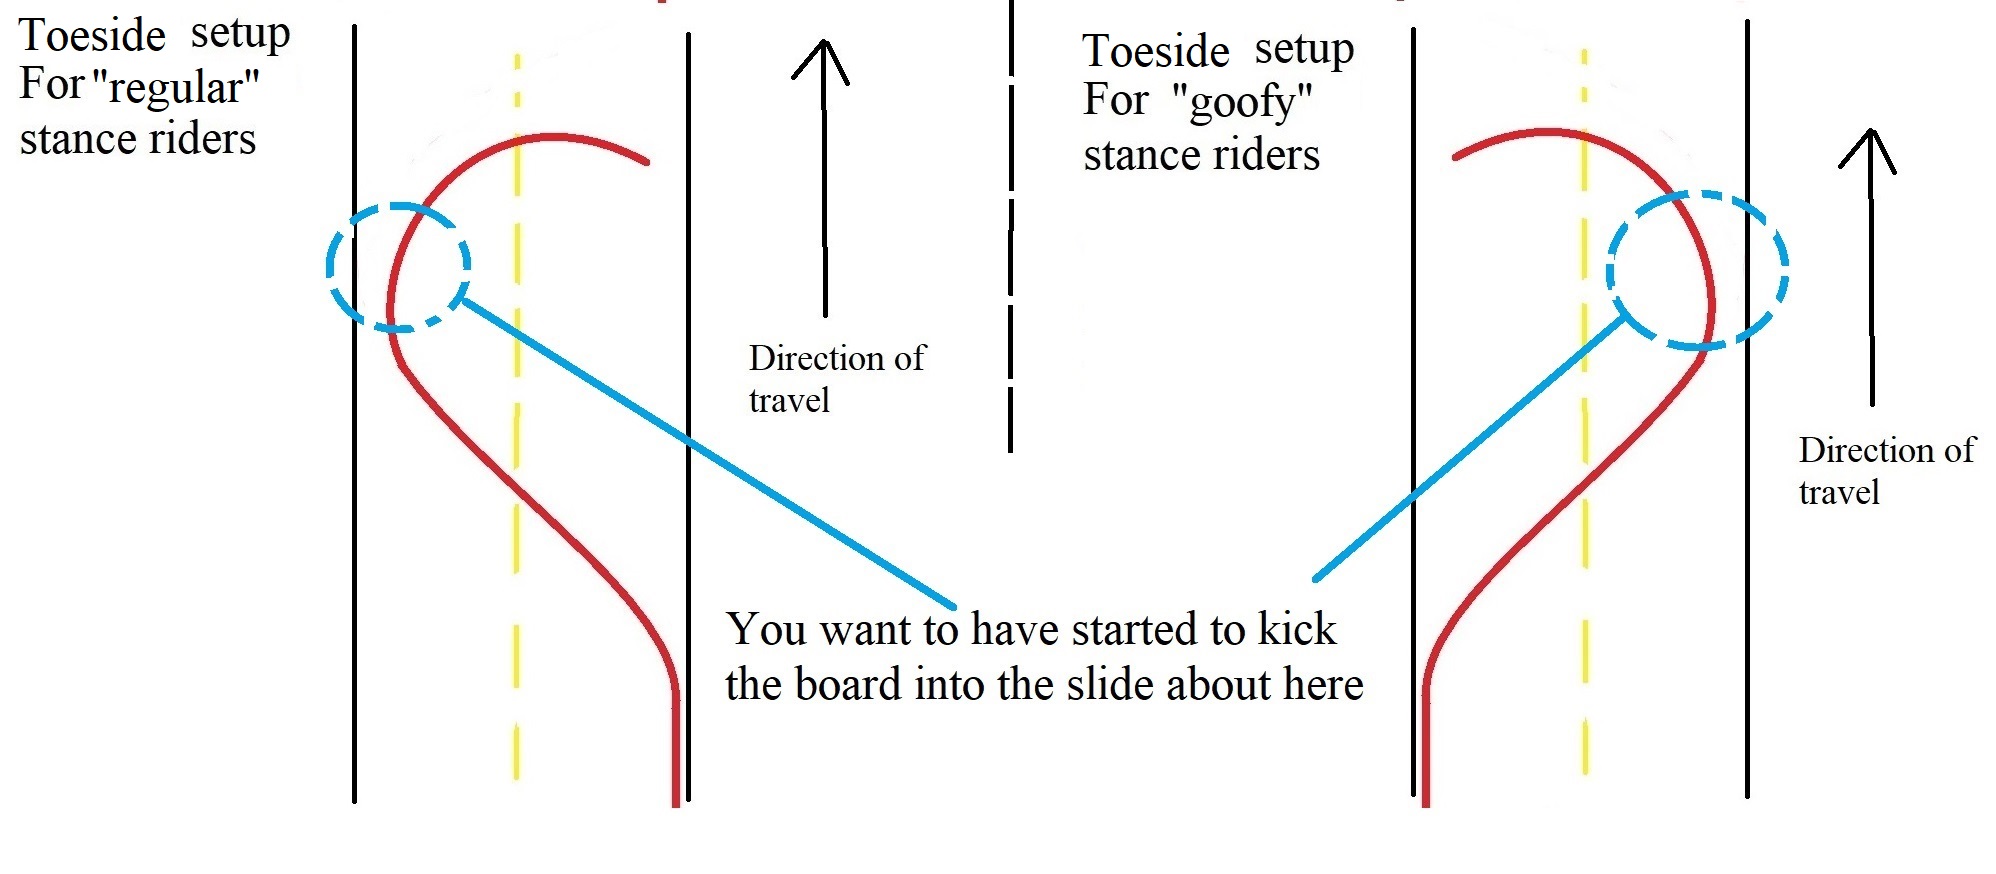
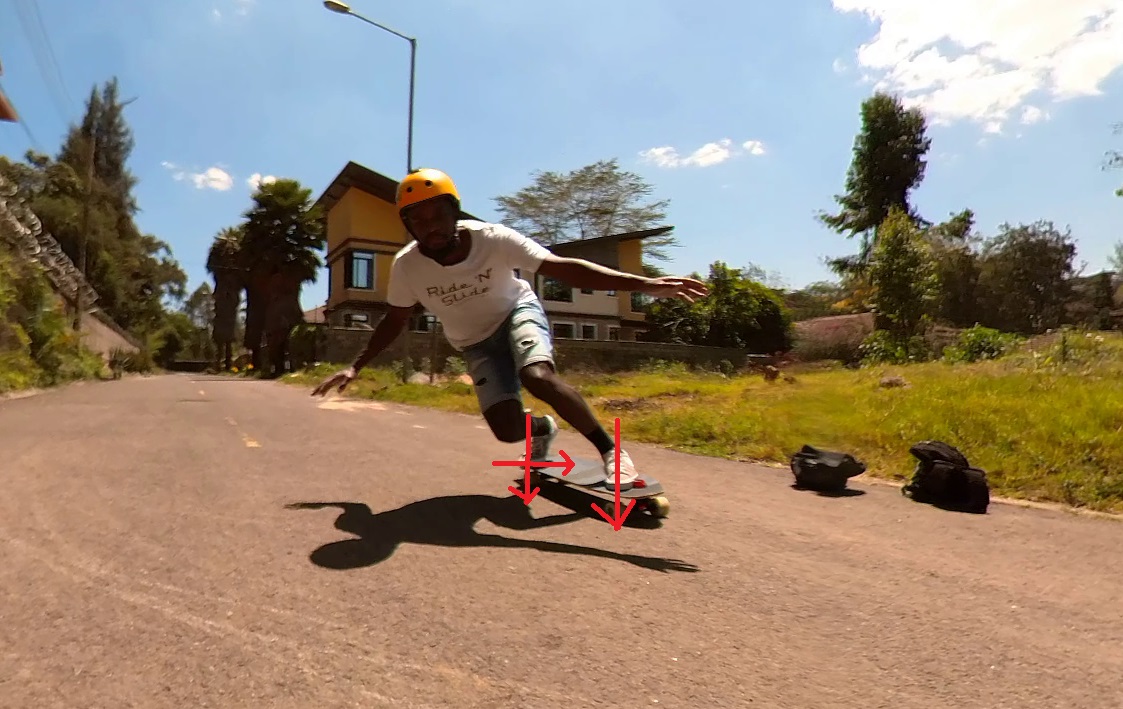
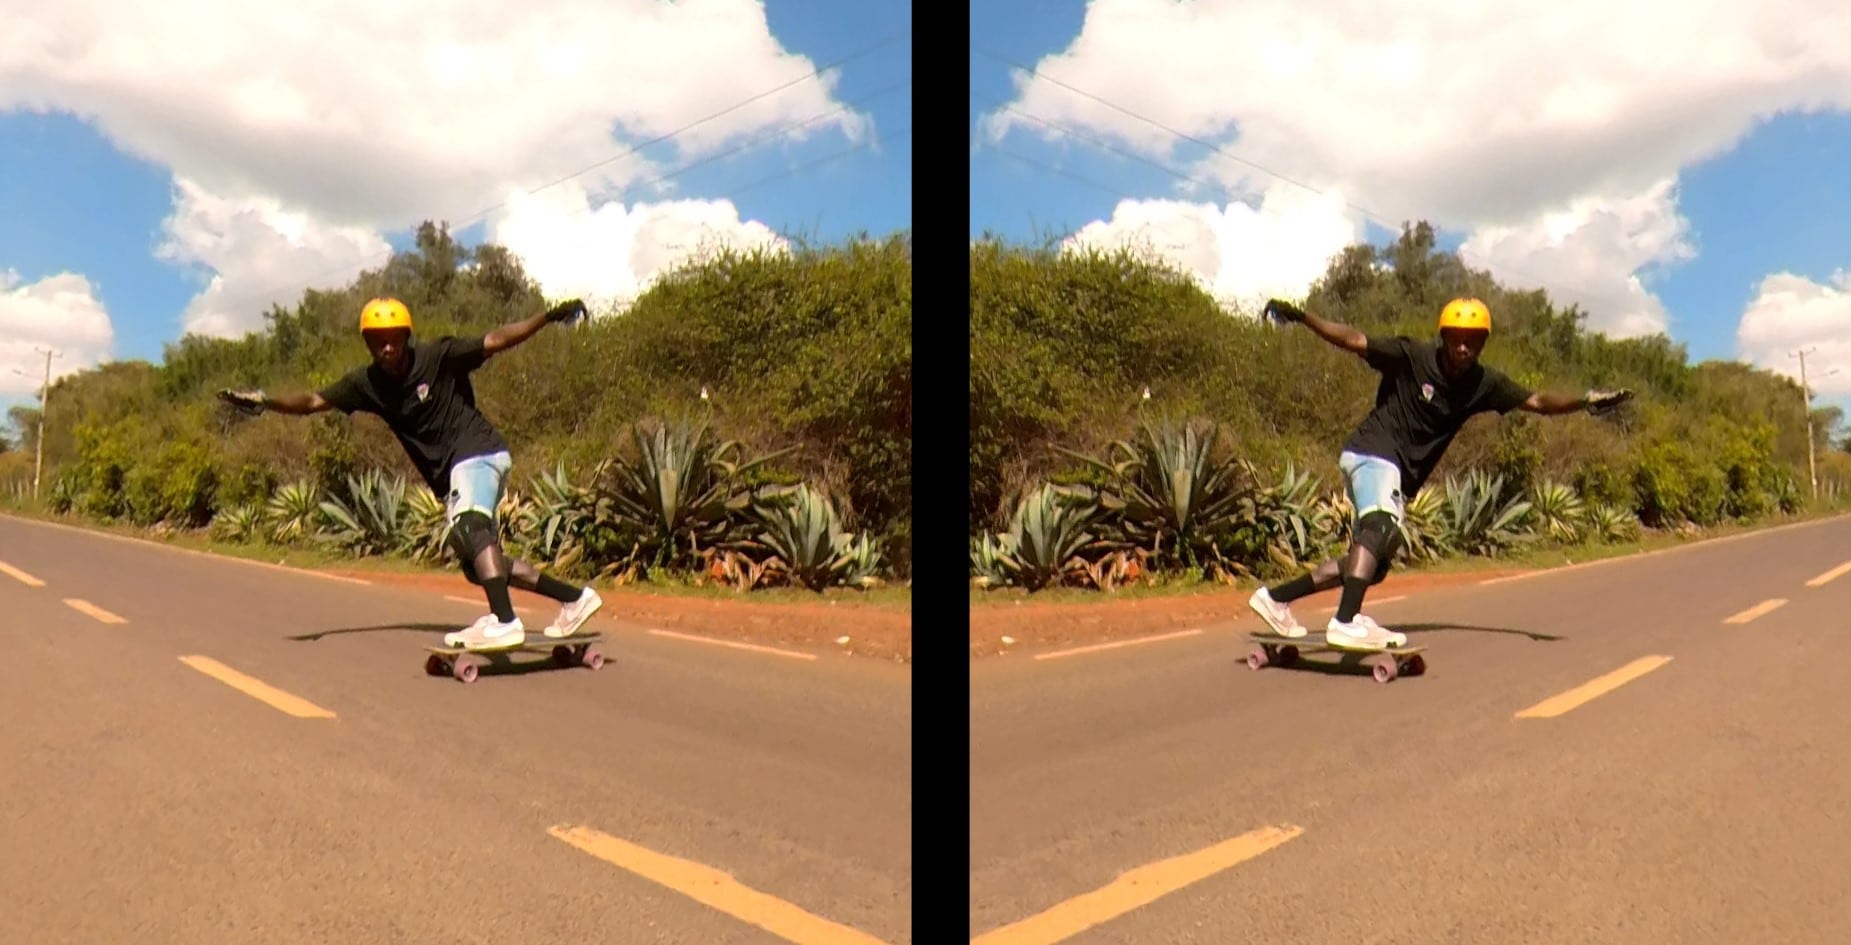
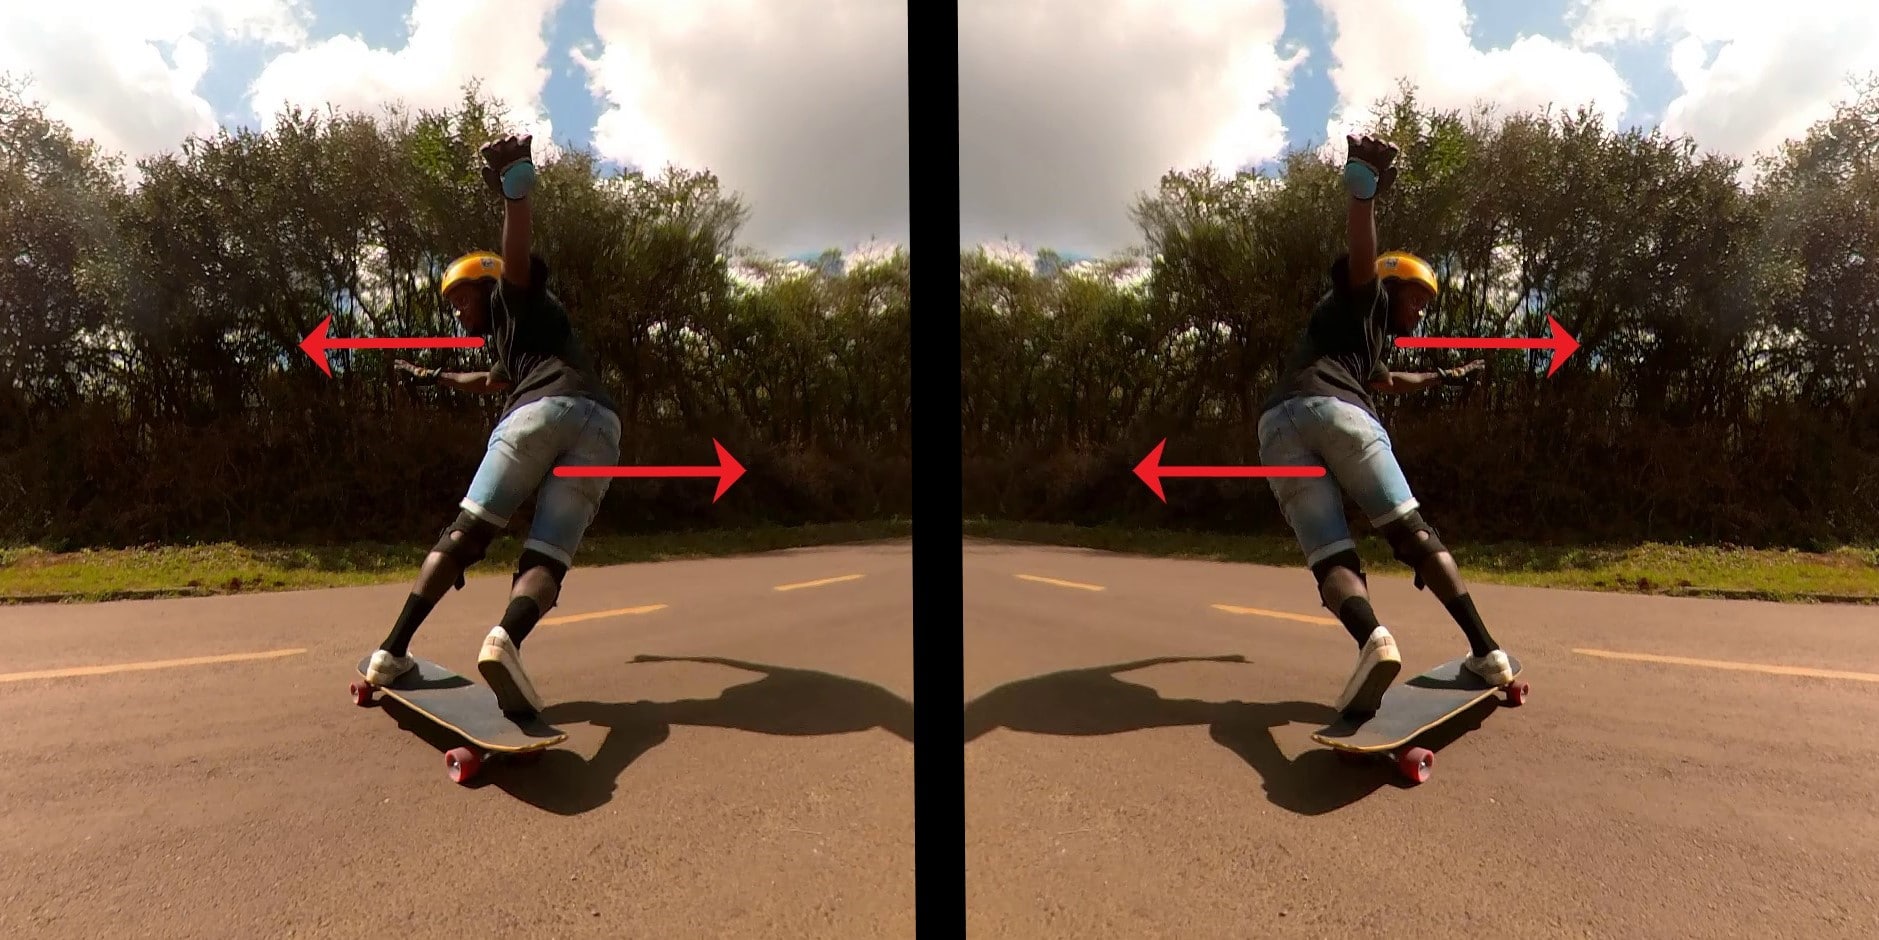
When you get to the zenith of the setup carve (illustrated by the image below), start leaning up the hill as you decompress, you then kick out the board and follow it around with your body. You kinda do all of this at the same time.
- Decompressing allows you to kind of deweight the wheels and makes them very easy to kick them out.
The following steps all happen in quick succession or almost simultaneously sometimes. They happen very quickly.
Step 4.1 – Leaning up the hill
With toesides, leaning up the hill is something you do simultaneously with decompressing. You have to figure out how much you lean up the hill on your own.
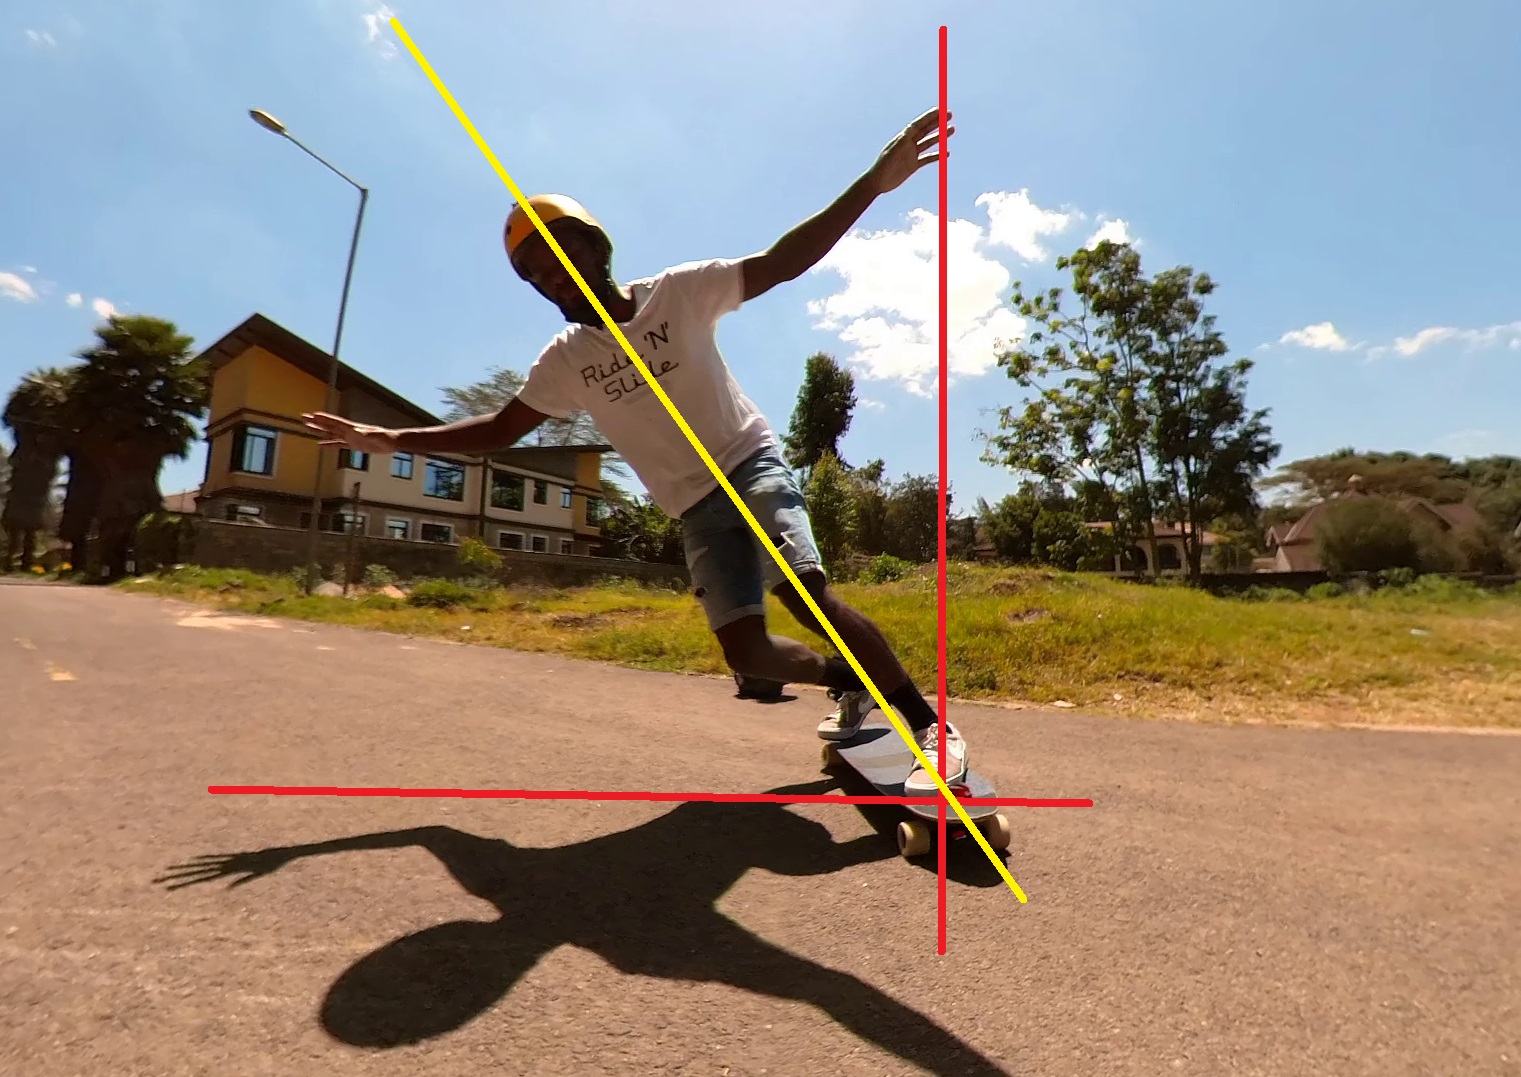
The above image isn’t a suggestion of how much you should lean (but you can try and see if it works for you). How much you lean will depend on your setup, your wheels, how much concave your deck has etc. – it is dependant on the person and their setup. The image above simply illustrates how much I am leaning.
Step 4.2 – How to “decompress”
Decompression is simply coming out of the compression position (with your knees bent), and extending yourself upwards.

The trick with toesides, is you don’t fully extend yourself and unbend your knees all the way. You want to keep your knees bent slightly. This will help with balancing, but most importantly, it will also aid you in applying and keeping pressure and weight on your toes.
Applying pressure and being balanced on the toes is key to holding and floating comfortably on toeside 180s.
Step 4.3 – Turning with you shoulders
Now with how I do my toesides, my shoulders (and widespread arms) turn in before I kickout the board, but they DON’T control the slide. They rotate in (slightly) ahead of the kickout so my upperbody is in a good position to comfortably handle the rotation of the board. My upperbody won’t be in a fixed position though, it will naturally rotate slightly as the board comes around. But at some point of the 180, the board rotates ahead of my upper body, and I then have to quickly bring in (and rotate) my upper body (which I do on compression) just before hookup.
So in summary three things happen:
- The shoulders turn in slightly before the kickout.
- My upper body hangs in there, letting the board do the thing.
- I bring in my upper body on compression and hook up.
Watch the decompression clip above for a more visual illustration of this happening.
I think the above explanation is abit confusing (I’ve also kinda skipped ahead and included the other steps, but I feel I can’t explaining it fully without doing so). But it should make sense when you’ve practiced the toeside and are able to get real world feedback.
It should make sense when you’ve put together the whole puzzle and see how everything fits together.
Step 4.4 – The kickout
The kickout is more of pushing your board out. It’s not an aggressive push, but one that is firm.
As I said above, you will have 70% of your weight on your front foot, and about 30% on the back foot.
You push out with your back foot whilst keeping your front foot stiff and firm. Remember to have most of your weight on the balls of your feet or toes.
You essentially want to push your board into the 180* direction, almost like you’re pivoting on your front foot/truck.
You also want to push outwards (or forwards) but also down at the same time to keep your back foot planted and from slipping off.
I also find with toesides, once I push I just sort of hang in there, I don’t need to provide anymore input with my back toes, I just sort of hold the pressure, and the board continues on its trajectory.
After the kickout, just rotate, and hang in there. Just trust that the board will come around by itself.
Some tips
- Weight on your toes.
- Don’t unbend your knees and straighten your legs all the way when you decompress, keep your knees bent a little bit.
- Video yourself to see what you’re doing.
- Make sure you are setup carving.
- Make sure you stay on top of the board and not let it get away from you, sometimes the board can keep going and will leave you behind.
- Keep your weight on toes and lean a moderate amount, you won’t highside.
Step 5 – Where to look? Blind faith
When the board is rotating, I simply look down at the ground or at my board. I don’t force myself to look down the hill or anywhere, it’s just natural for me to look at my board/the ground.
You kinda don’t have anything to look at … Yes I know it’s scary but just allow it to happen. Don’t force yourself to look down the hill or anywhere, as this will affect the positioning of your shoulders and affect the rotation of the board as well. As I said in the coleman guide, the rest of your body wants to follow your head & shoulders, so please, don’t force your head to look anywhere.
You just have to let the board do its thing and have blind faith it is rotating and will get you where you are going. If you’ve done everything else correct, you should have no worries.
You will get used to this. With practice you will see that your initial trajectory and estimated carve are all you need to direct the board. You will get comfortable.
Step 6 – Hook-up …
This next step depends heavily on feel and experience. Initially, it will be guesswork.
As the board rotates almost gets to 180*, I like to give it a little nudge which pushes it into 180 and makes it regain traction. (At this point I’m still maintaining pressure on my stiff front foot).
Step 6.1 – … and recompression
Simultaneously as you’re hooking up the board, bring in your upperbody (because your body will be kinda twisted, still kinda facing up the hill) and compress as the board hooks up, or just after it hooks up.
Watch the video in Step 6 above for a visual illustration.
The compression is key to absorb the momentum of the 180* rotation and keep you on board comfortably.
AND BOOM.
Step 7 – Switch
You’ll now be riding away in switch. You can do a switch toeside, or a switch heelside 180 to bring back the board.
Make sure you’re doing the compression, decompression …
To learn more about why this is important, check out my explanation in my heelside stand-up 180 guide here.
How to do a toeside/backside stand-up slide
What is a toeside stand-up slide?
Also known as a backside stand-up slide, this is a slide you do without touching the ground, on the toeside side. You keep the board sliding under 90*s as you do this slide.
The 180 is the foundation
If you‘ve managed to learn the 180 according to my guide, then doing the speed check will be a piece of cake.
The steps until about step 4.3 are literally the same, so we will carry on from that point.
Step 0.1 to Step 4.2
You’re going to follow the guide above for these steps. Everything is the same, the setup carve, the compressions, decompression, and how much you lean up the hill etc.
So do those before you get to the next step in this section.
Also remember, in Step 4, all the stuff happens kinda simultaneously.
Step 4.3 – Point your shoulders where you want to go
As you decompress, you point your shoulders where you want them to go.
You keep them focused on that point throughout the slide and don’t try to move them, or don’t allow them to be the SOURCE of any movement.
Keeping them still/facing a fixed point is important. Your board naturally wants to follow your shoulders in the slide (which is why doing a 180 by throwing your shoulders out around is so easy). So any movement from them could cause the board to rotate over 90*s.
You can keep your shoulders in place by focusing on a fixed point. This fixed point could be an imaginary point, or better, the inside of a corner or the apex.
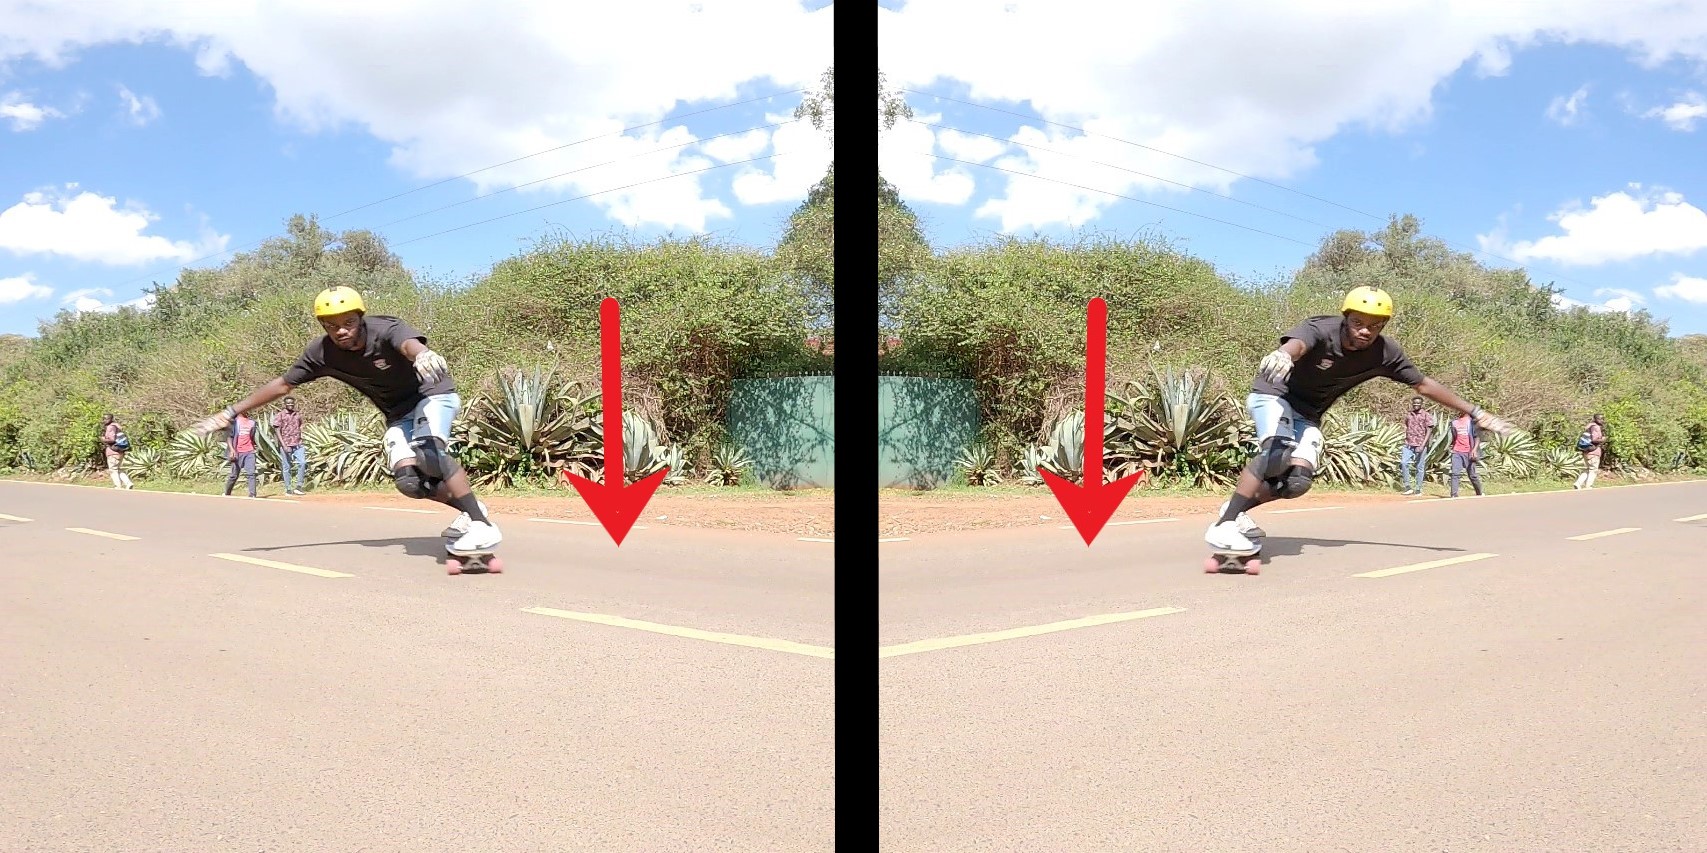
The video below highlights how much the shoulders DON’T move during the slide.
This is SUCH an important step
One of the key steps of the toeside stand-up slide is pointing your shoulders where you want to go, or simply keeping them pointed down hill throughout the slide.
This is a make or break step. If you mess this up, you likely won’t do any toeside stand-ups successfully.
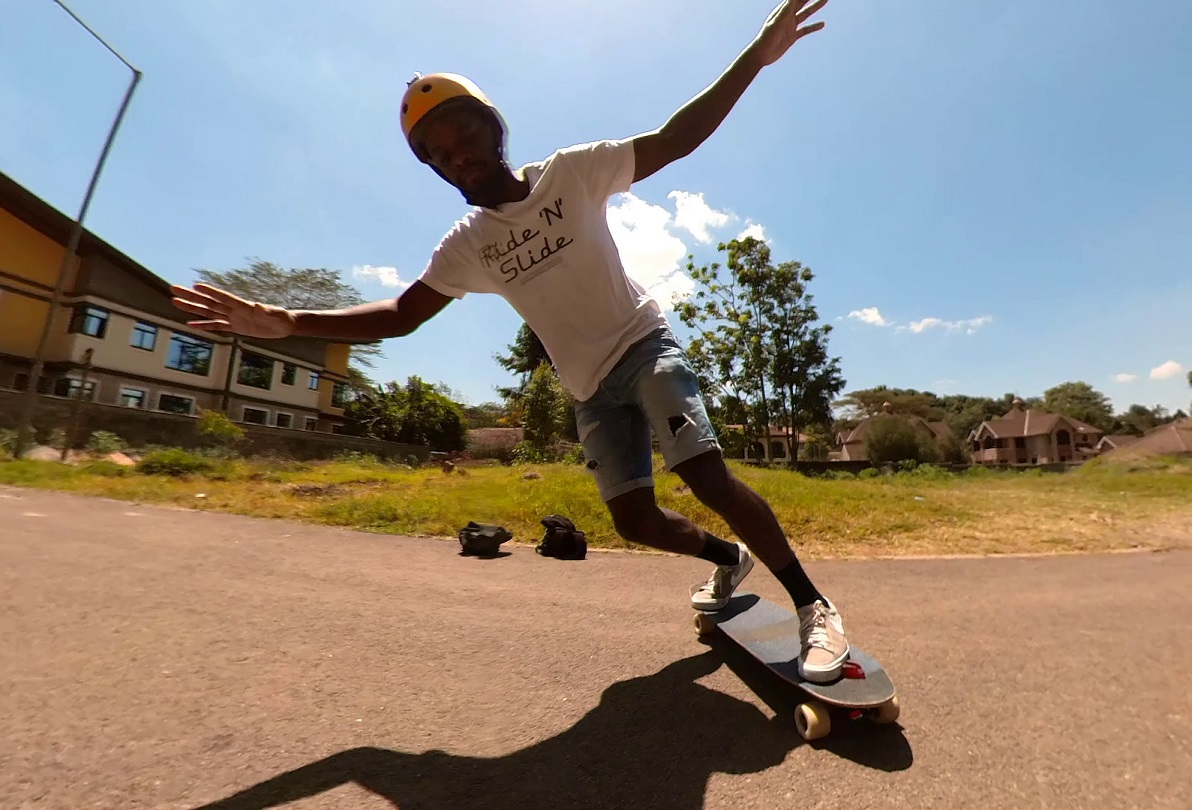
As demonstrated by the image above, you may sometimes literally have to twist your body in half to point your shoulders down the hill. Or twist yourself in half to simply get them pointed where you want to slide towards.
Step 4.4 – Weight placement and stance
The next devastatingly important thing to do is place your weight in the right places.
Though I have already told y’all how to weigh the board, I want to reiterate that you need to be putting pressure and weight onto your toes.
It is especially important with the front foot. This is what will allow the slide to keep going.
You also have to be really posted and stanced on that front foot.
Those two things are key to making this slide successful.
Step 4.5 – The kickout
Instead of using your front foot as a pivot, and pushing the board all the way around with our back foot like we did in the 180, this time we are only pushing to a shallow angle and maintaining alot pressure on your front foot.
With about most of your weight on your front foot and alot less on your back foot, as we come out of the decompression we start kicking out/pushing out our back foot.
We push it out to a shallow angle.

At the same time, we maintain pressure on our front toes. This is key.
With our front and back foot, we are pushing both out and down. With the back foot, you can sometimes push more out than down.
This is key
The setup carve, compression, leaning back, and decompression will help make doing the slide a ton easier.
But, what will make or break our attempt is leaning on our front foot, and how much pressure we can maintain on it keep the slide going, and how our chest and shoulders are facing down the hill.
Pushing out your backfoot is surprisingly easy, but the leaning off the foot, maintaining pressure on it, and making sure your chest is looking down the hill is quite difficult … but your results may vary of course.
So you gotta be careful with both of those things and make sure you are doing them correctly.
And yeah … you should be able to toeside stand-up slide.
Step 5 – Hang in there
Once you’re in the slide, just sort of chill and let the board keep sliding forward. Once you’re done sliding as much as you want to, it’s time to get the board to hook up.
Step 6 – Hookup and compression
The hookup from toeside standups can be a little tricky.
Now to regain traction, start to release pressure off your back foot and keep maintaining pressure on your front foot. This will allow the board to rotate into the other direction, guiding it so it can regain traction.
As this happens, allow your body to follow the board. I find the body naturally wants to fall forward a little bit with the toeside stand up.
You will then feel the board regain traction, and as it does this/just before, begin bending your knees to recompress and absorb the momentum of the hookup.
With the toeside, I’ve found timing the hookup and recompression is very important to a successful and smooth slide.
It may also help to throw your leading arms down to help with the recompression and absorb the momentum of the slide.
And boom you just did your first toeside standup slide.
Tips
- Learning the 180 according to this guide, it will make learning the stand-up slide so much easier. SOOOO much easier.
- Video yourself to see what you’re doing.
- Make sure you are setup carving.
- Weight on your toes
Aaaand thats it. Was this Toeside stand-up guide useful?
Let me know if this guide has been useful. As always these guides are a bit difficult for me to make so your feedback is really appreciated. Helps me know if I’m doing something right or wrong.
Big thanks to all my patrons for the support – David, Squirrels Adventures, Mike, Jed, Mowgii, Jan, Josh, Jay, Jay, Bryan, @owencampbell777, @dkwan, Alex, Kasajja, Domnik, Reuben, @pablo.vega.andrade, Vlad, Asa, Helge, DeLacoste, Peder, Josh, Mike, Anthony, @issishreds, Greg, Jackson, Slipa, Louisa, Bill, Steve, John, Austin, @bomber_p_, Brian, Jeffrey, Jules, Henry, Austin, Philip, and, LordSummerisle73, Justin. I couldn’t write articles like this without you guys’ support.